

Bugs can disrupt your customer and employee experiences, making it critical to promptly report issues to developers. This recipe shows you how you can automatically escalate bug reports to developers in Jira using the Zendesk action builder.
This recipe contains the following topics:
- What you’ll need
- Automating bug escalations from a ticket form
- Automating bug escalations with Copilot
What you’ll need
Skill level: Beginner
Time required: 20 minutes
- Action builder EAP
- Admin permissions
- Copilot add-on (optional)
- Jira login credentials
- Slack login credentials
Automating bug escalations from a ticket form
You can click here to watch a video of this recipe, or continue to the walkthrough.
1. In the Admin Center, click “Action flows” under Apps and Integrations > Actions.
2. Click Create flow in the upper right corner.
3. Name your flow and add a description.
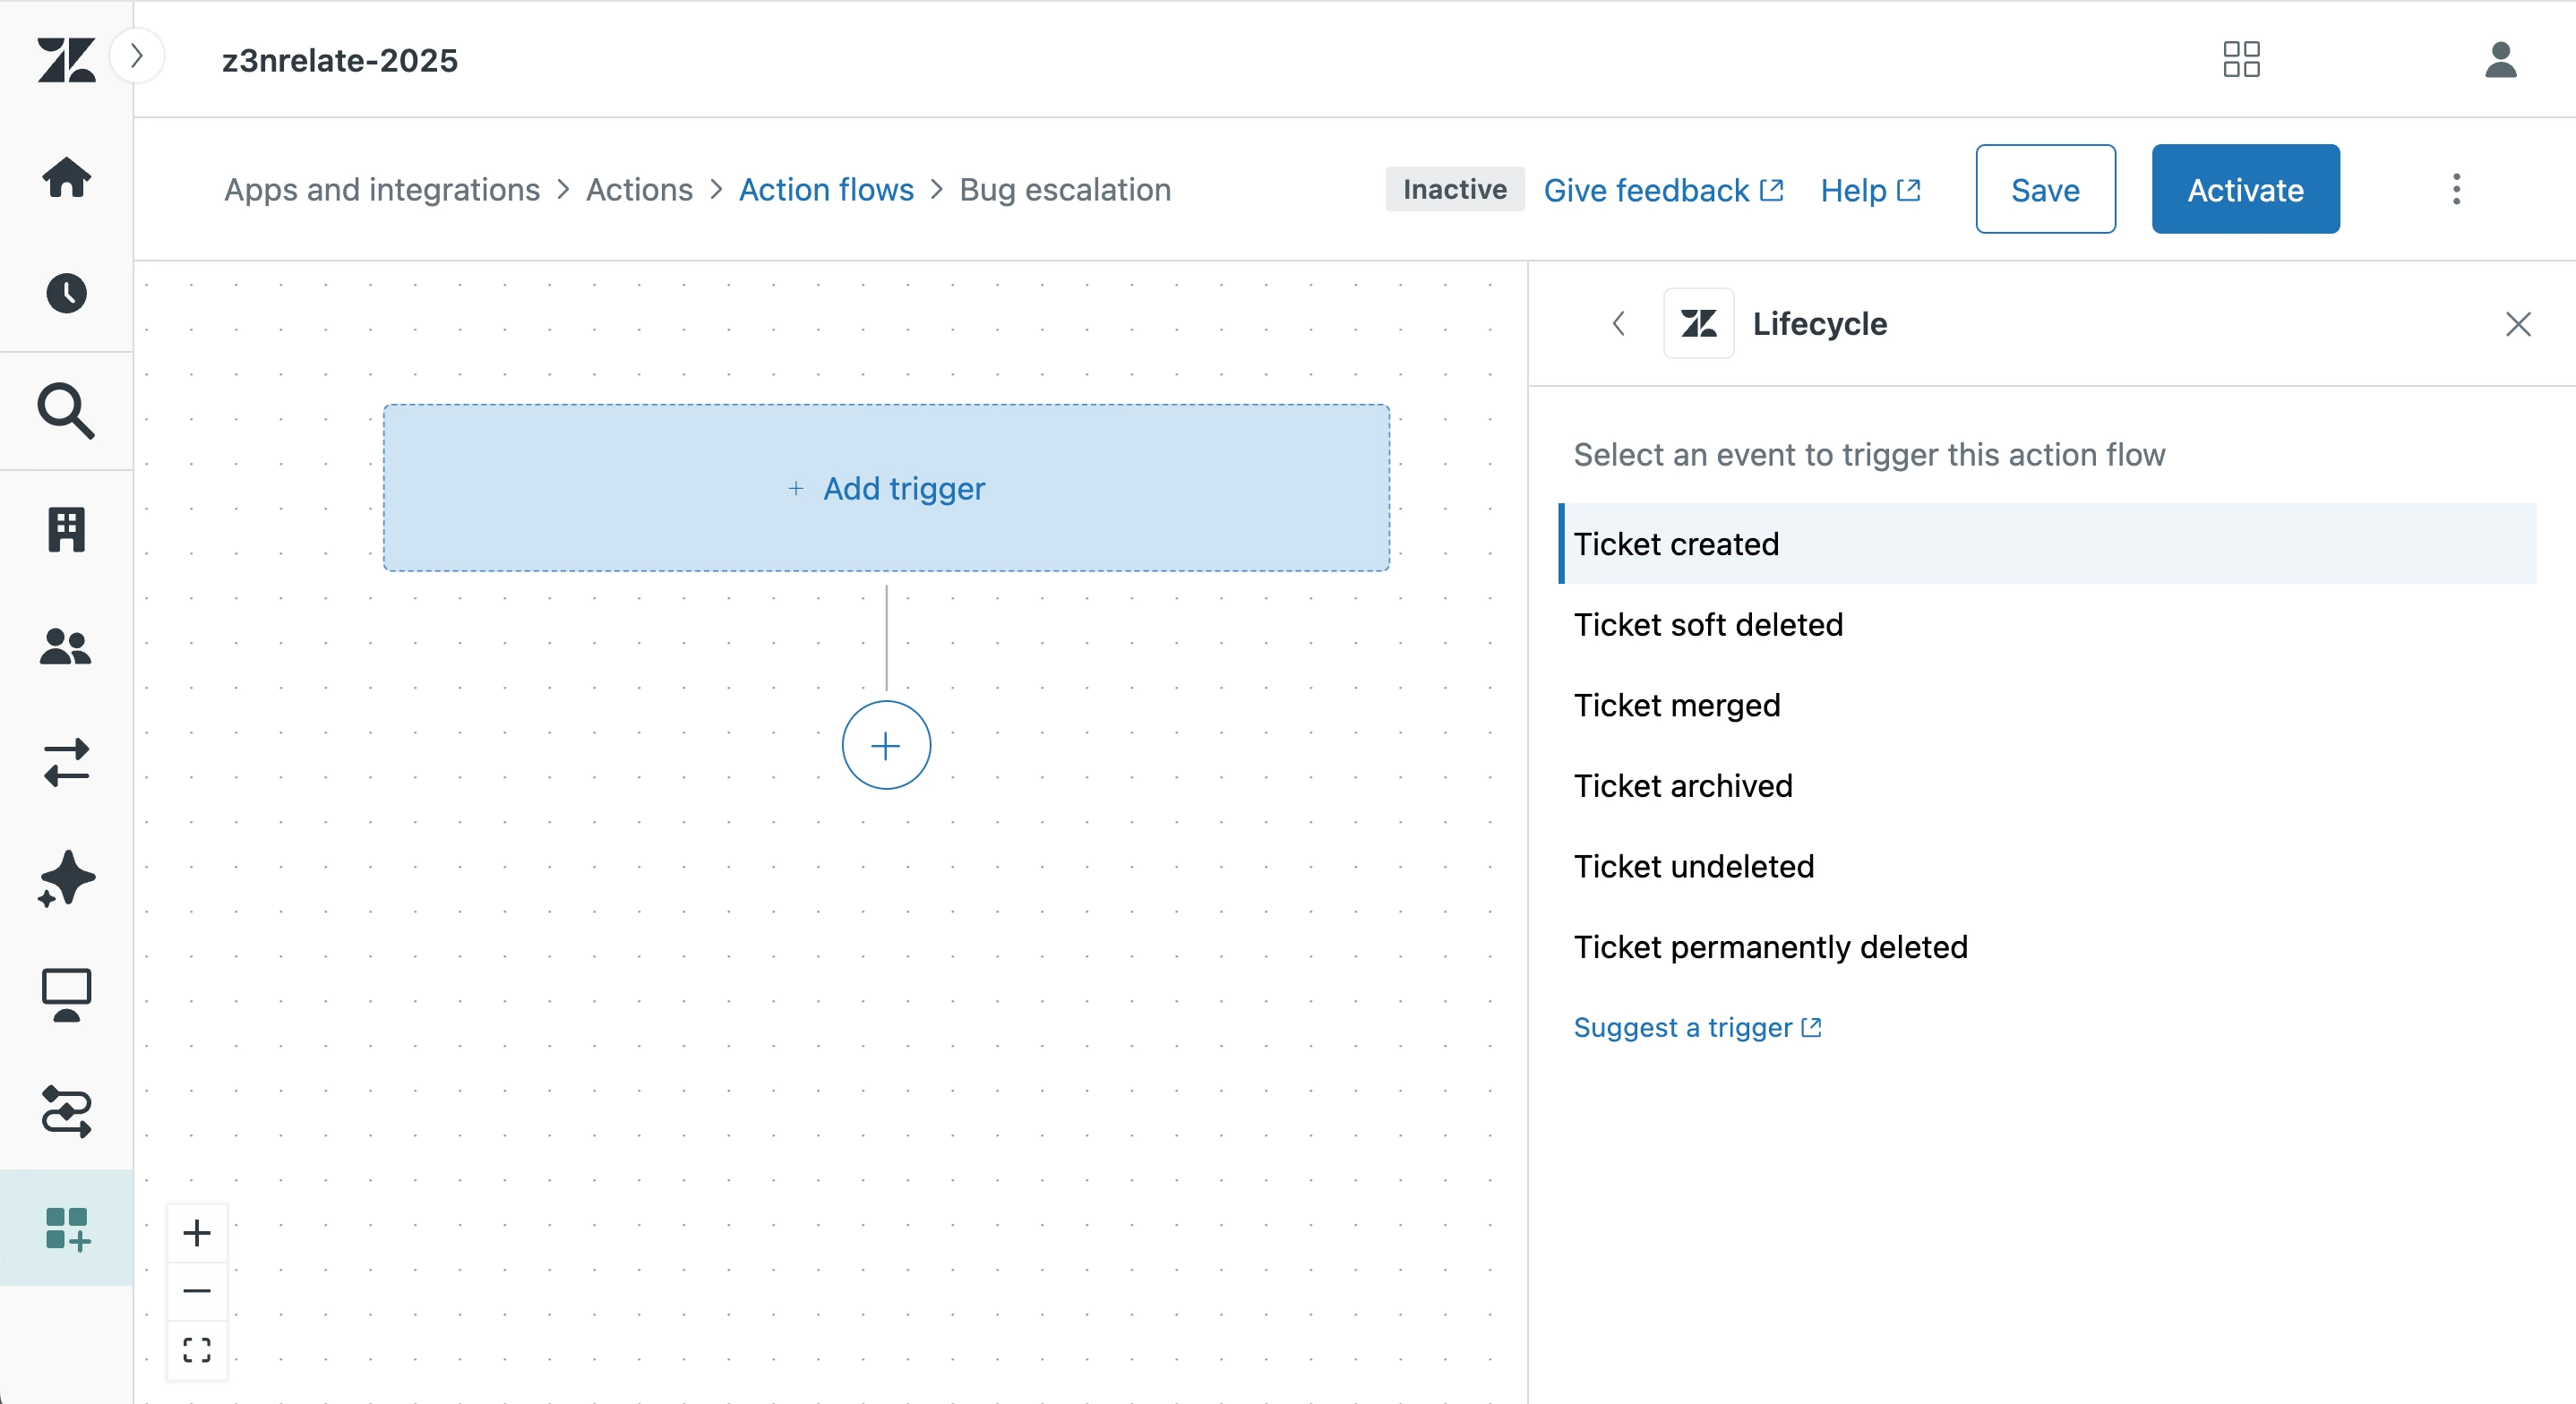
4. Click Add trigger in the action flow.
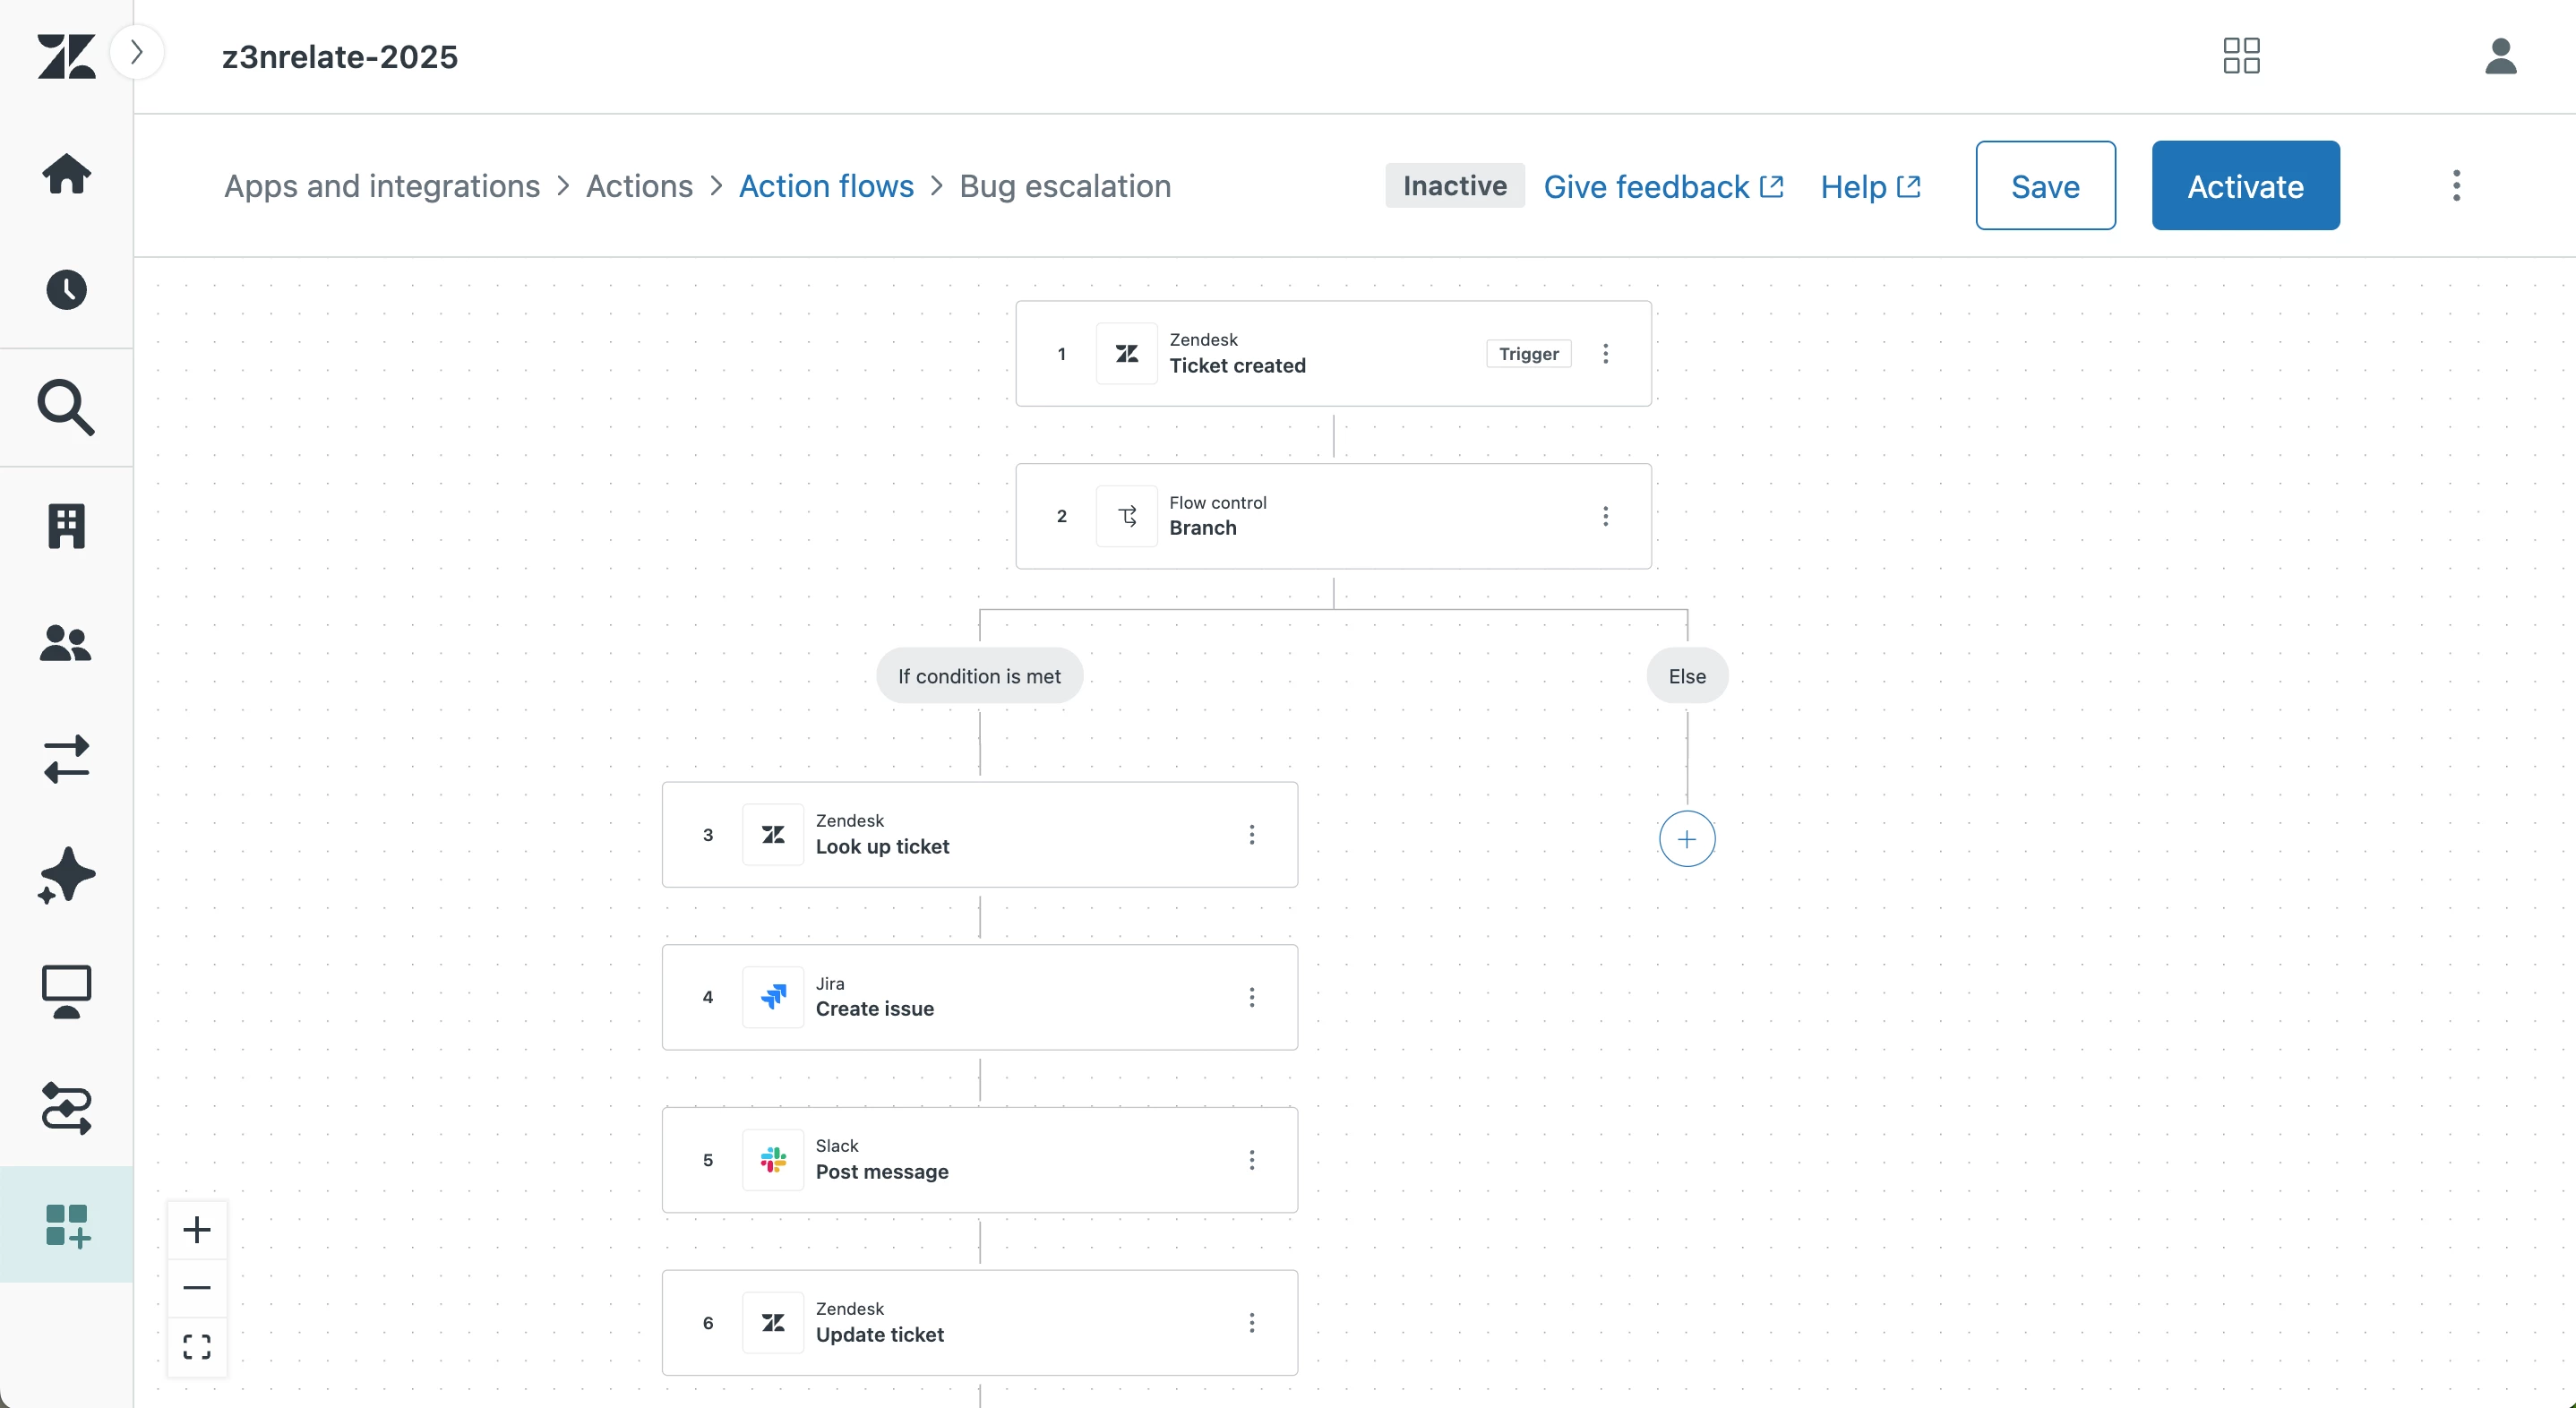
5. Select Tickets > Lifecycle > Ticket created. Click (+) to add the next step.
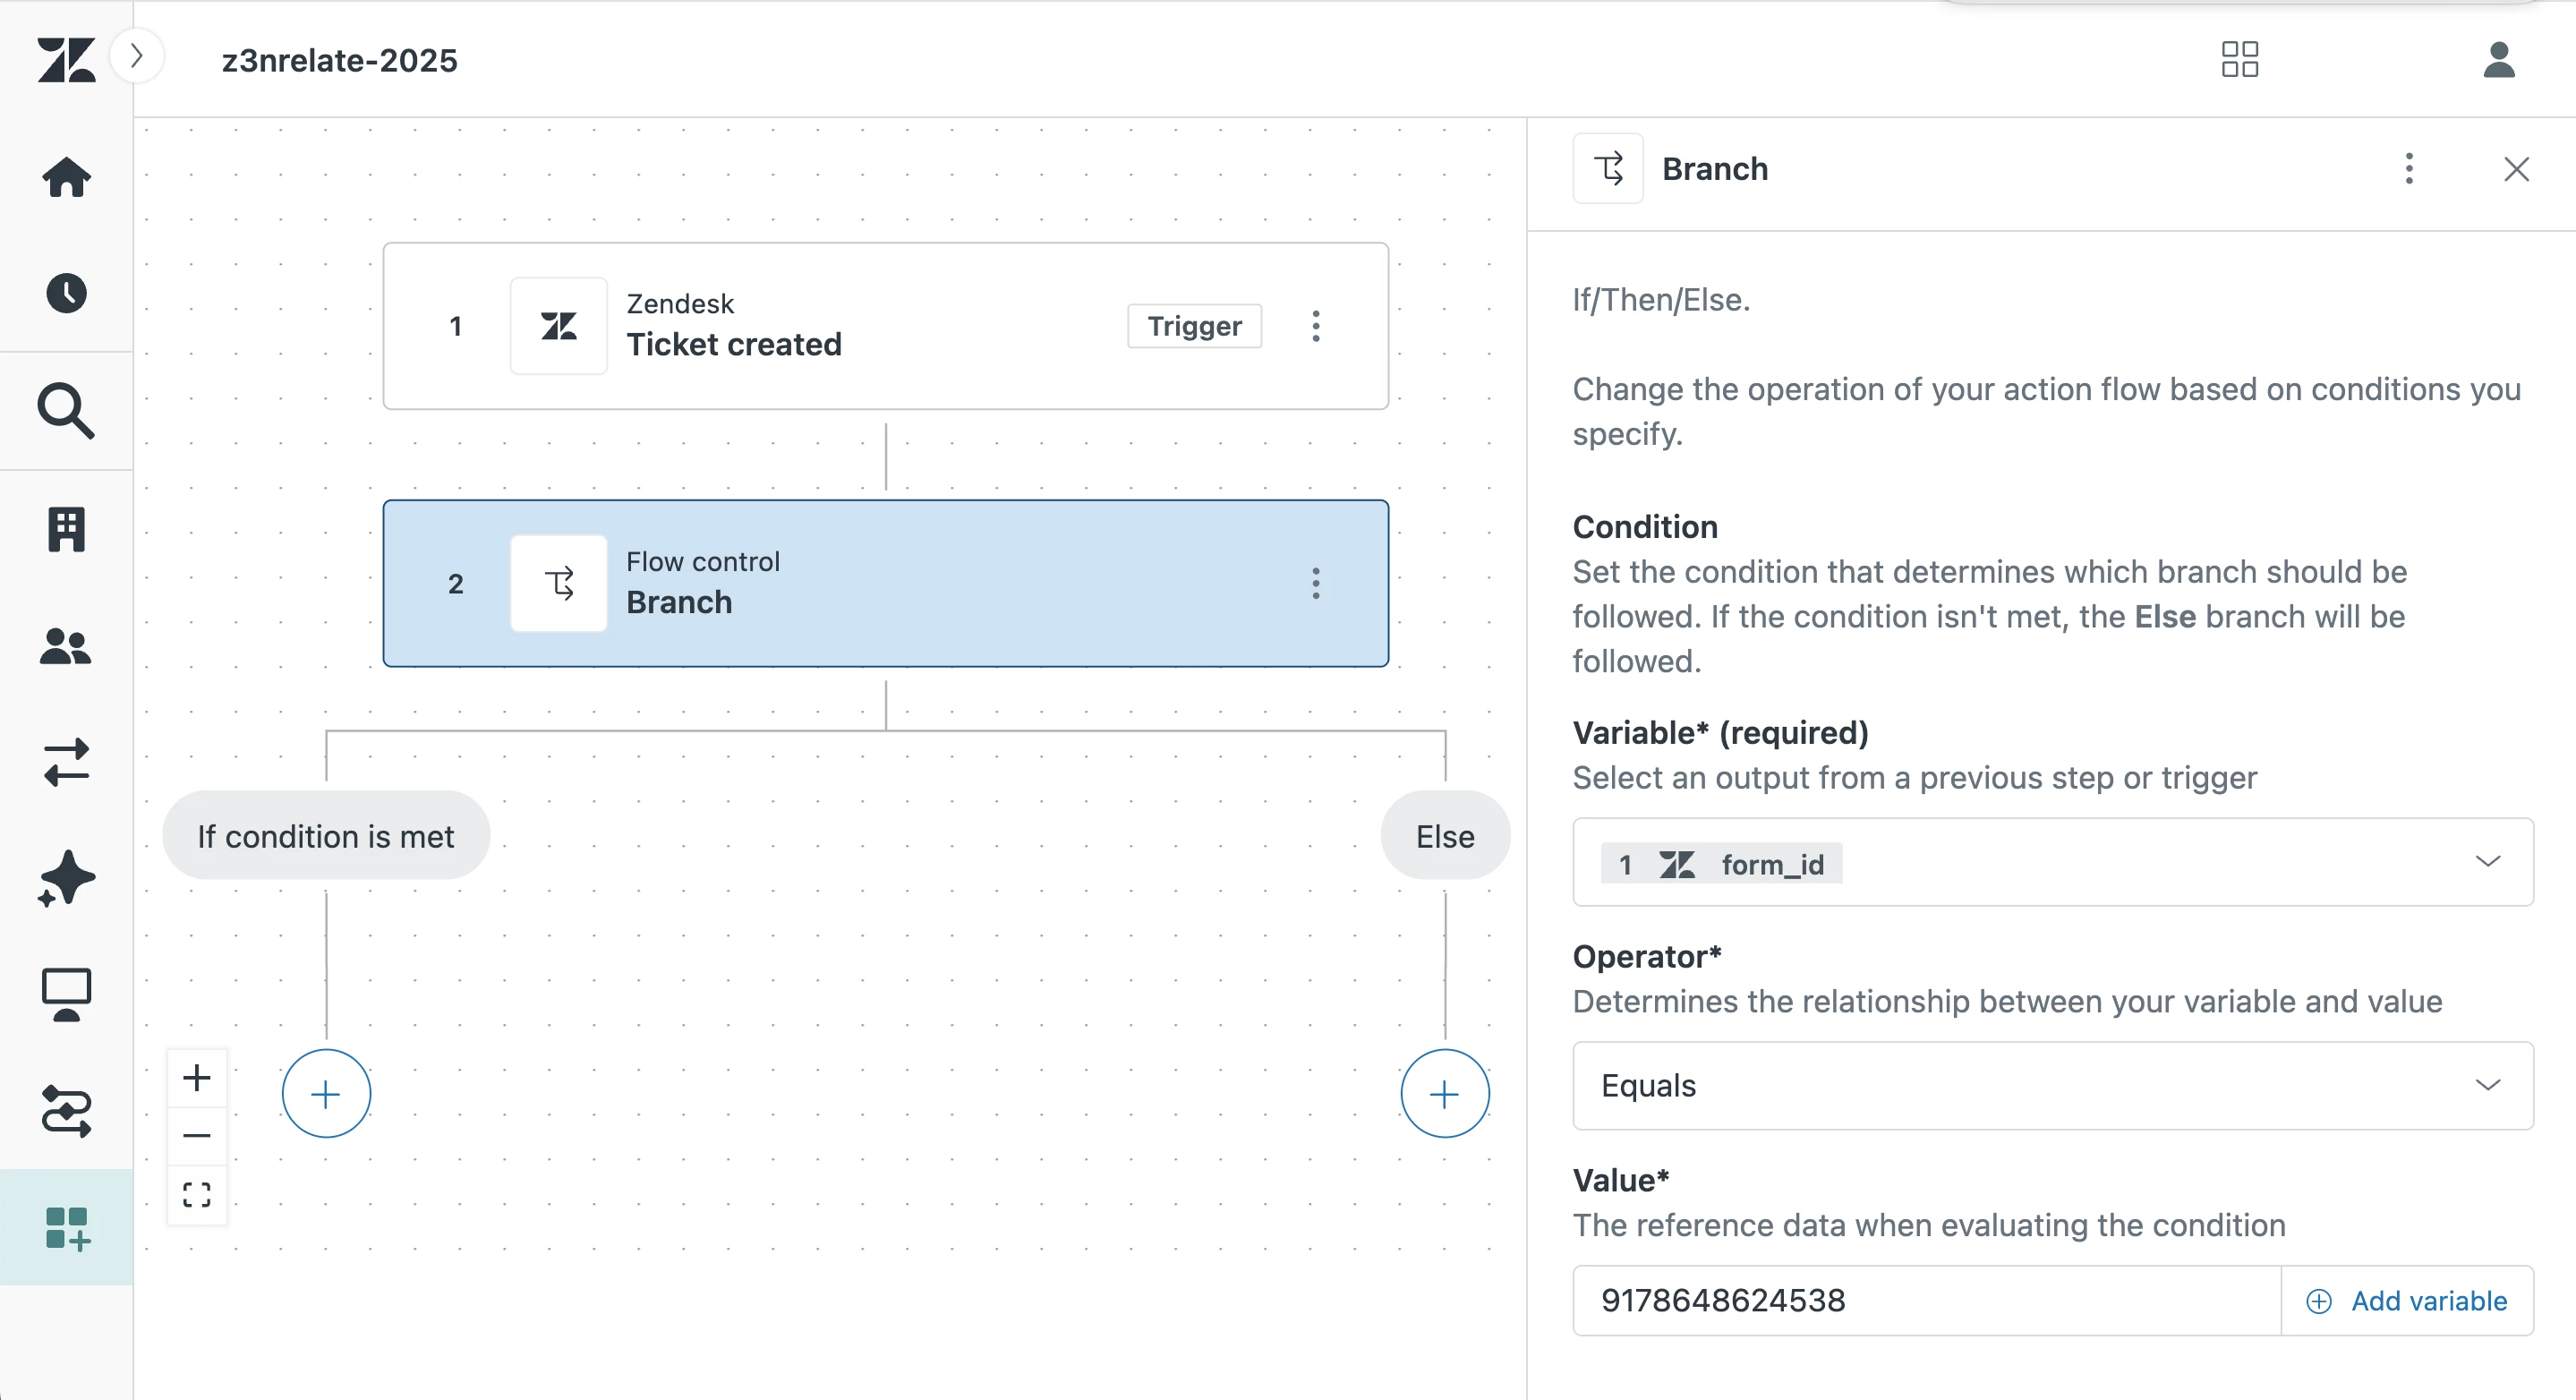
6. Select Flow control > Branch. Under Variable, select Ticket created > form_id > Equals> [Form ID]. Your form ID should be for the form used to report bugs or technical issues. To find your form ID, navigate to Objects and rules > Tickets > Forms > [Your form]. The form ID will be the final set of numbers in your URL.
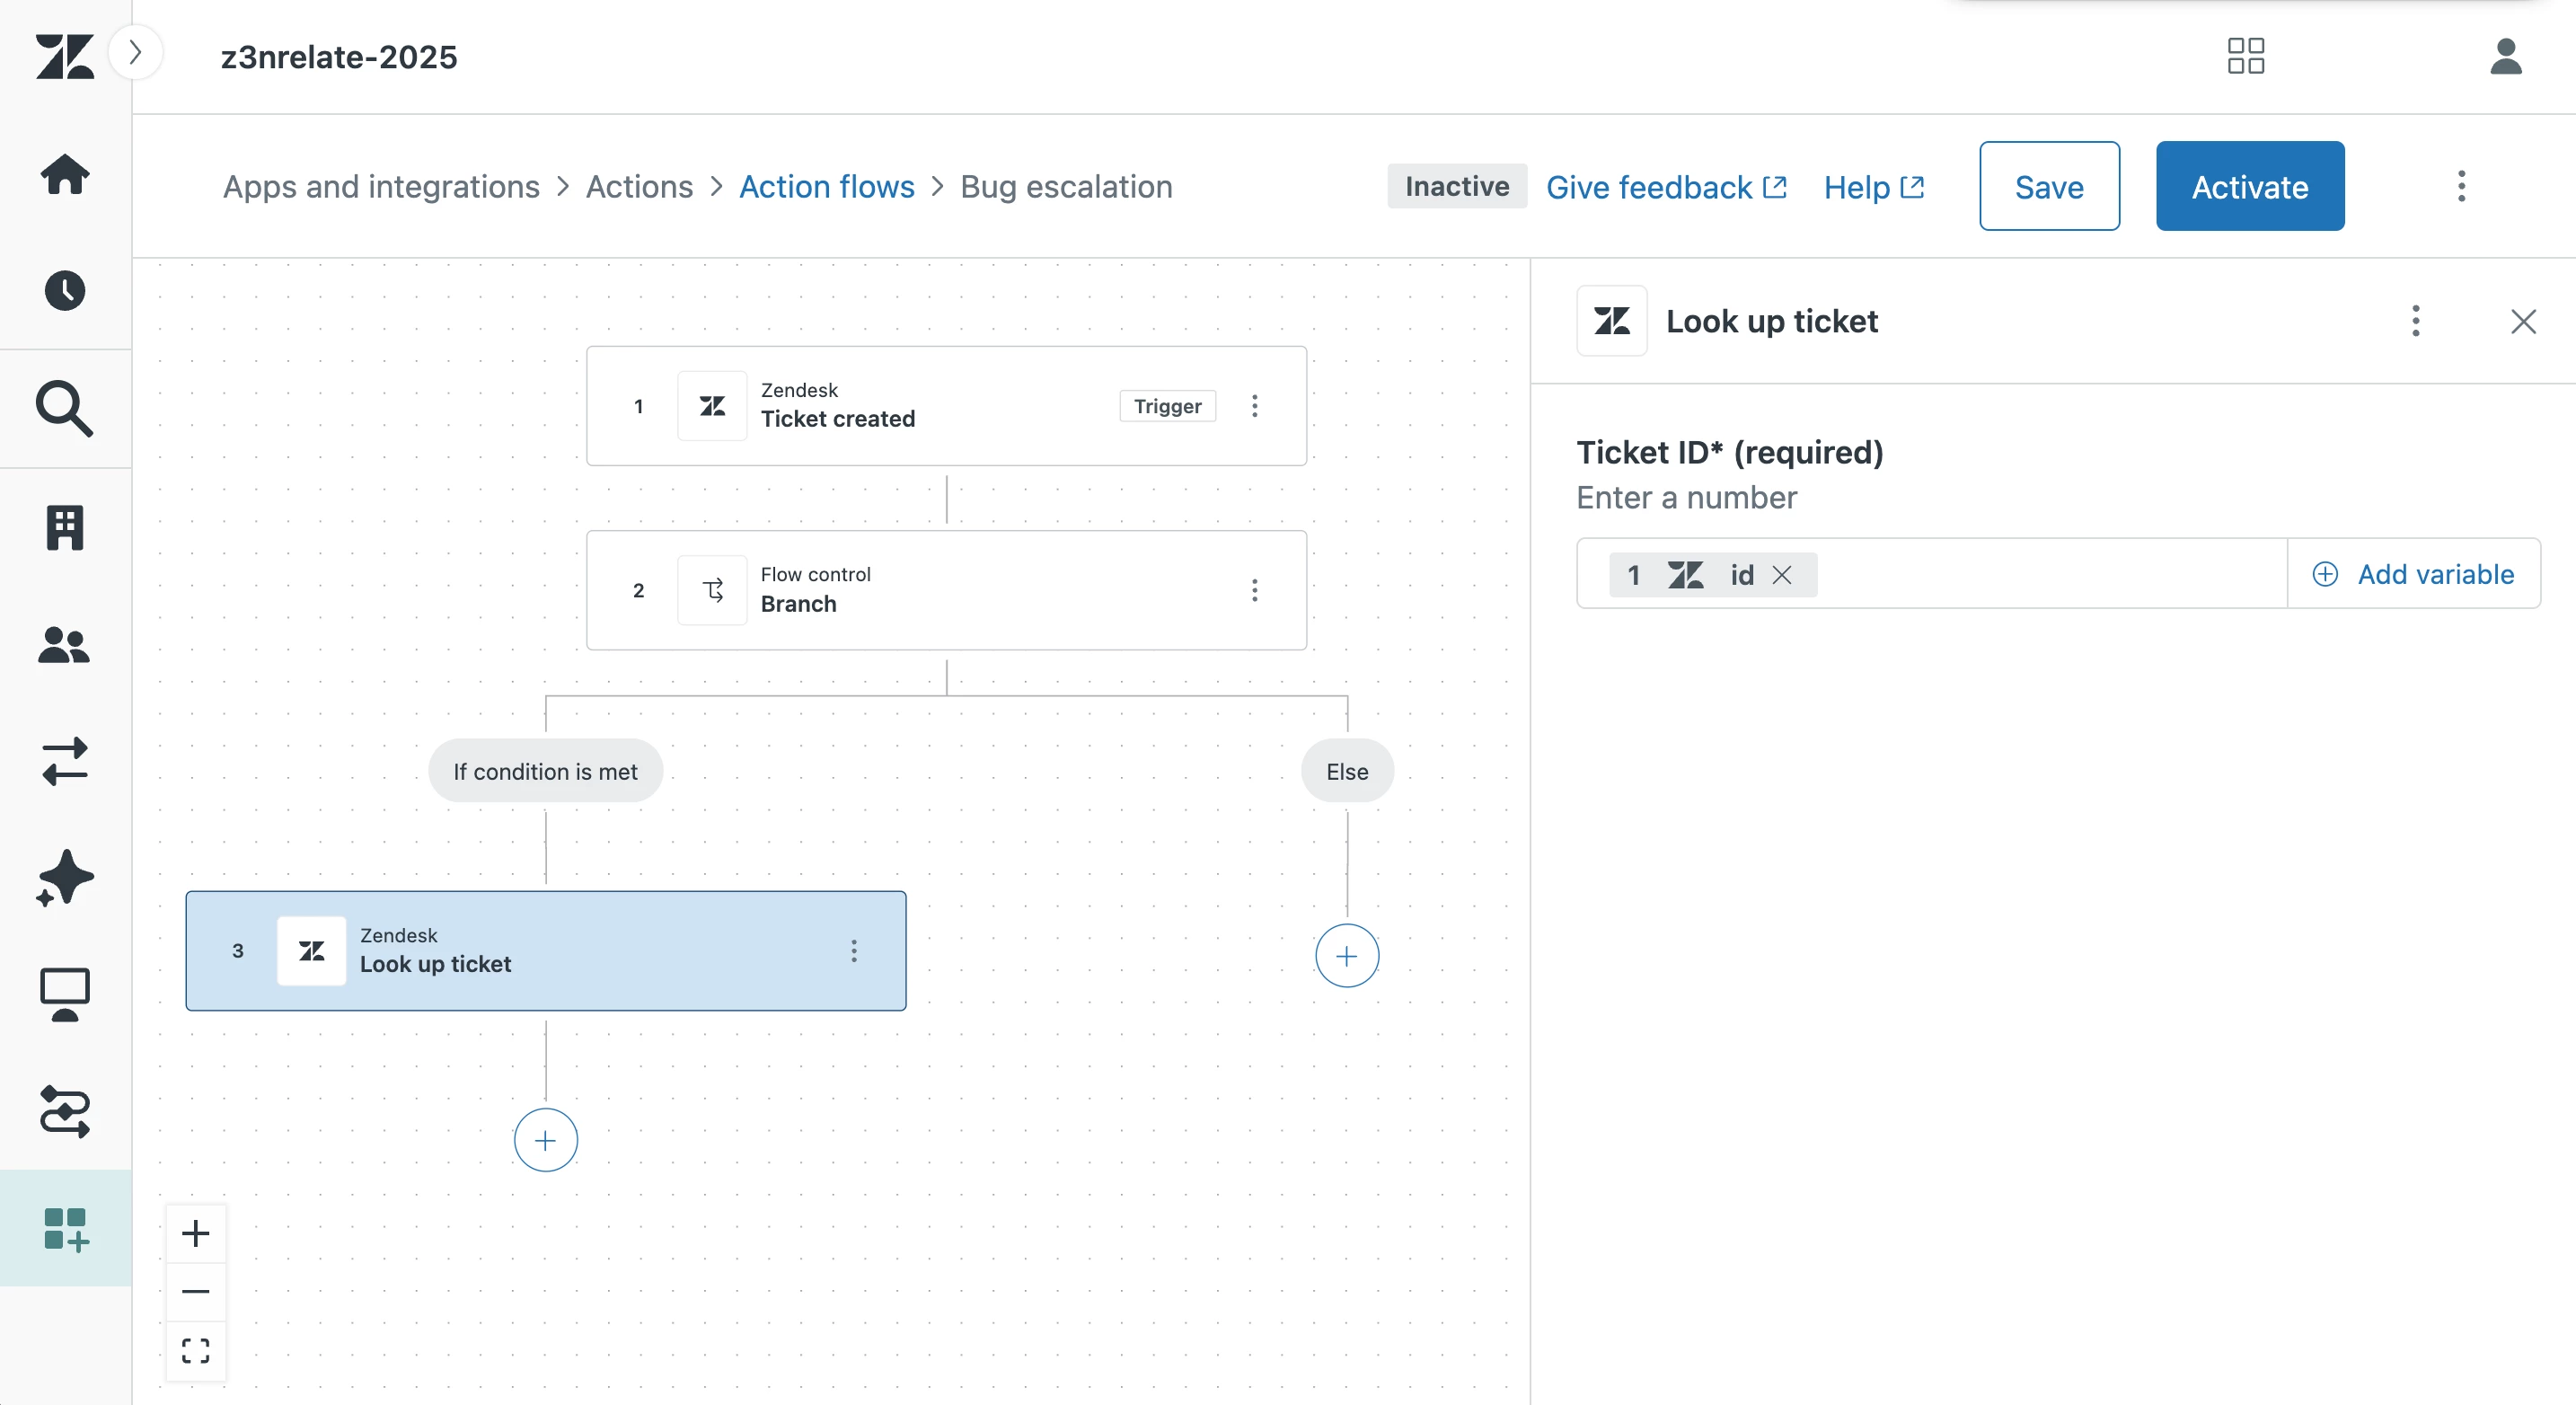
7. Under If condition is met, add a new step and click Zendesk steps > Look up ticket. A ticket ID will be required to pull ticket information. For this input, click Add variable > Ticket created > id. This will pull ticket data from the original ticket that triggered the flow. (This step is optional, but recommended if you wish to include additional ticket information in your Jira issue, that is not available as a variable from the trigger.)
8. Add a new step and select External steps > Jira.
9. If you have not connected the Action Builder to Jira, follow these steps.
10. After connecting to Jira, select Create issue from the list of prebuilt steps.
11. Complete the required and applicable fields. As a best practice, we recommend using variables to carry over data that is specific to each ticket. For example, you can use variables to include:
- The Zendesk ticket ID (Ticket created > id)
- Ticket subject (Ticket created > subject)
- The ticket description (Look up ticket > description)

12. The following steps are optional but recommended for internal collaboration. For example, to proactively notify developers about the new issue, add a step and select External steps > Slack.
13. If you have not connected the Action Builder to Slack, follow these steps.
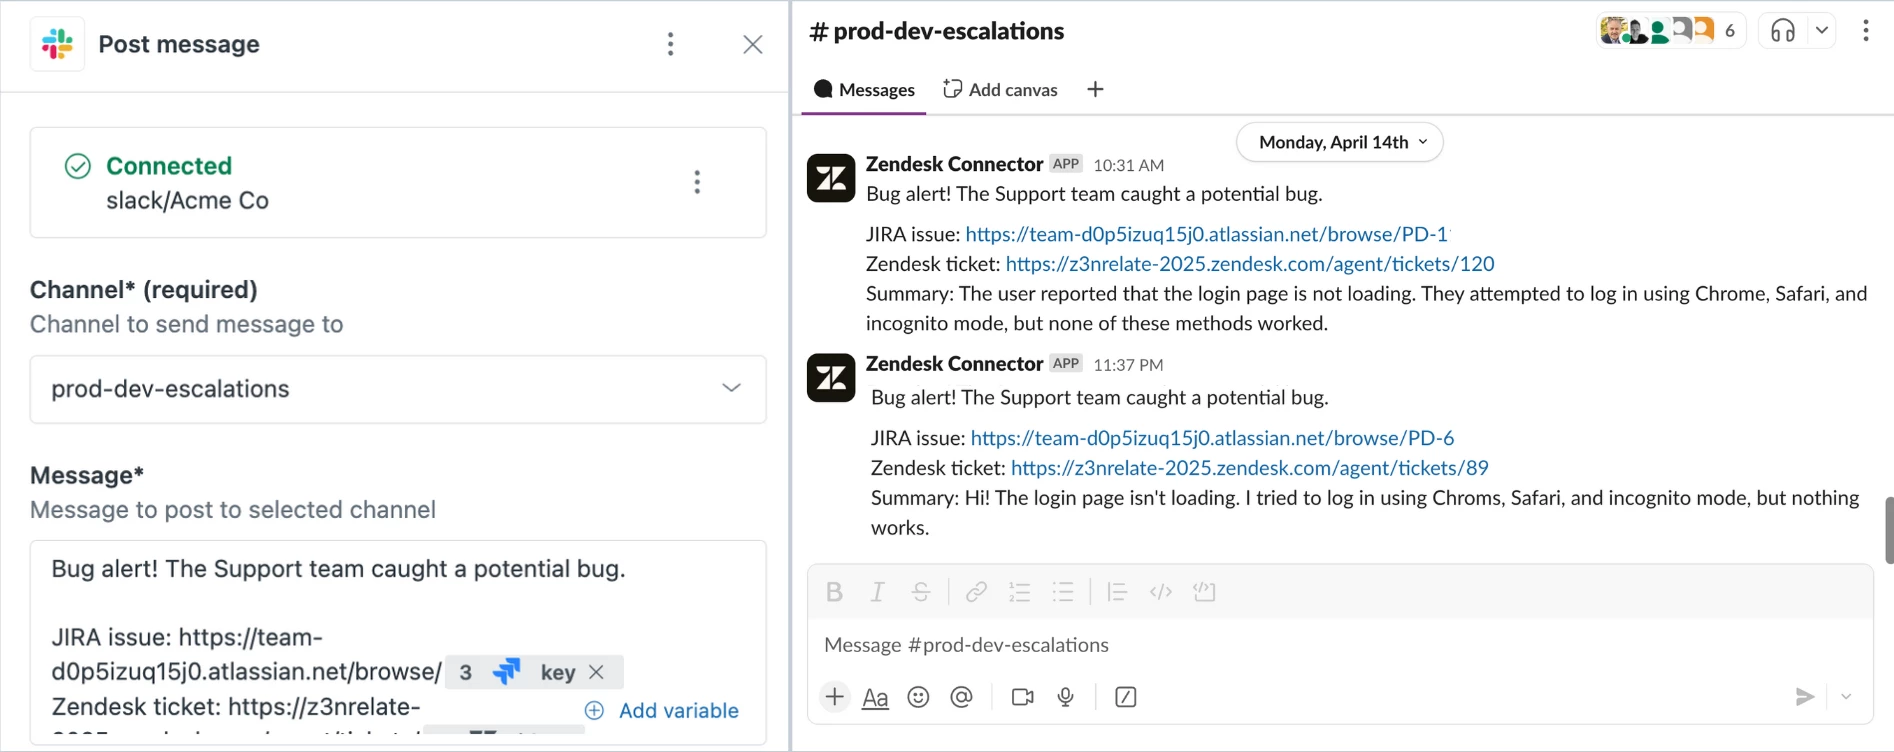
14. After connecting to Slack, select Post message from the list of prebuilt actions.
15. Select your development team’s Slack channel and include a message. For example, you can use variables to include:
- The Zendesk ticket ID (Ticket created > id)
- A link to the Jira issue (Combine your URL with the Jira: Create issue > key variable)
- A link to the Zendesk ticket (Combine your URL with the Ticket created > id variable)
16. To notify agents about the new Jira issue, add a step and select Zendesk steps > Update ticket. A ticket ID will be required. For this input, click Add variable > Ticket created > id to ensure the correct ticket is updated.
17. Under Comment, add a note informing agents about the flow. For example, “The development team has been notified about the issue via Slack. You can track the Jira issue at https://jira-example.atlassian.net/browse/[jira.key]”. To correctly setup a URL, combine your Jira URL with the Jira: Create issue > key variable.

18. Under Comment visibility, select Internal note.
19. Save your flow prior to activating.
Automating bug escalations with Copilot
You can click here to watch a video of this recipe, or continue to the walkthrough.
1. In the Admin Center, click “Action flows” under Apps and Integrations > Actions.
2. Click Create flow in the upper right corner.
3. Name your flow and add a description.
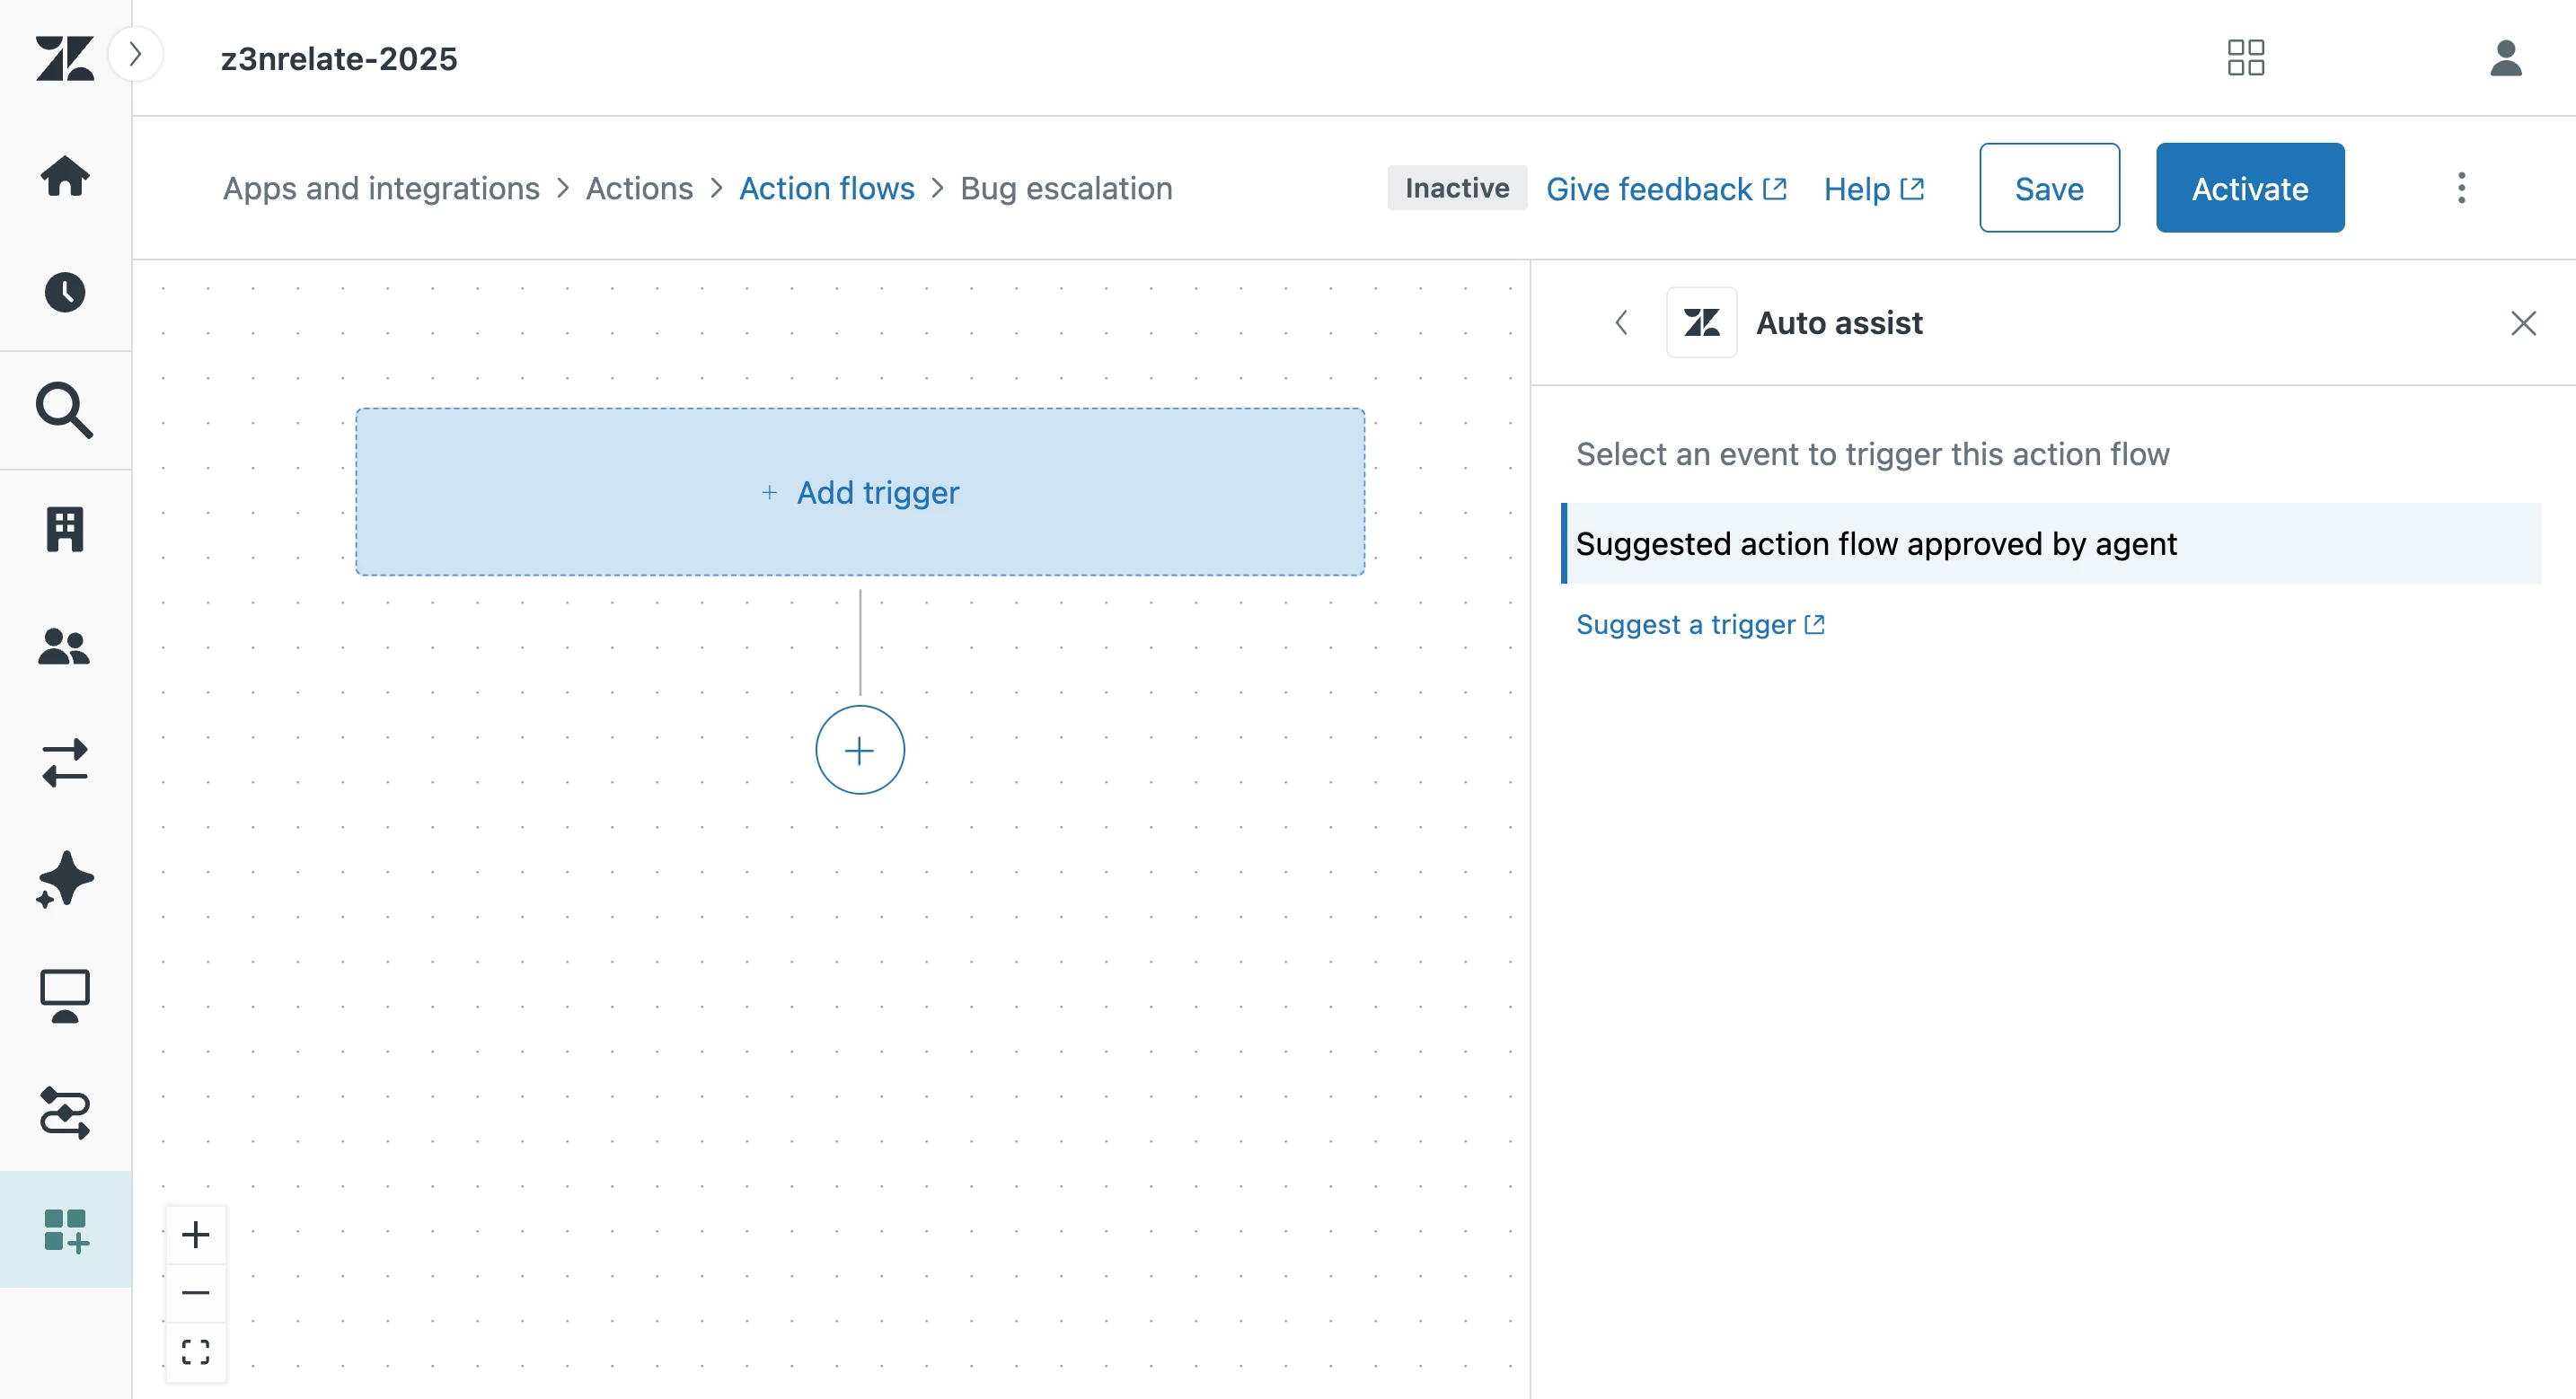
4. Click Add trigger in the action flow.
5. Select Agent copilot > Auto assist > Suggested action flow approved by agent.
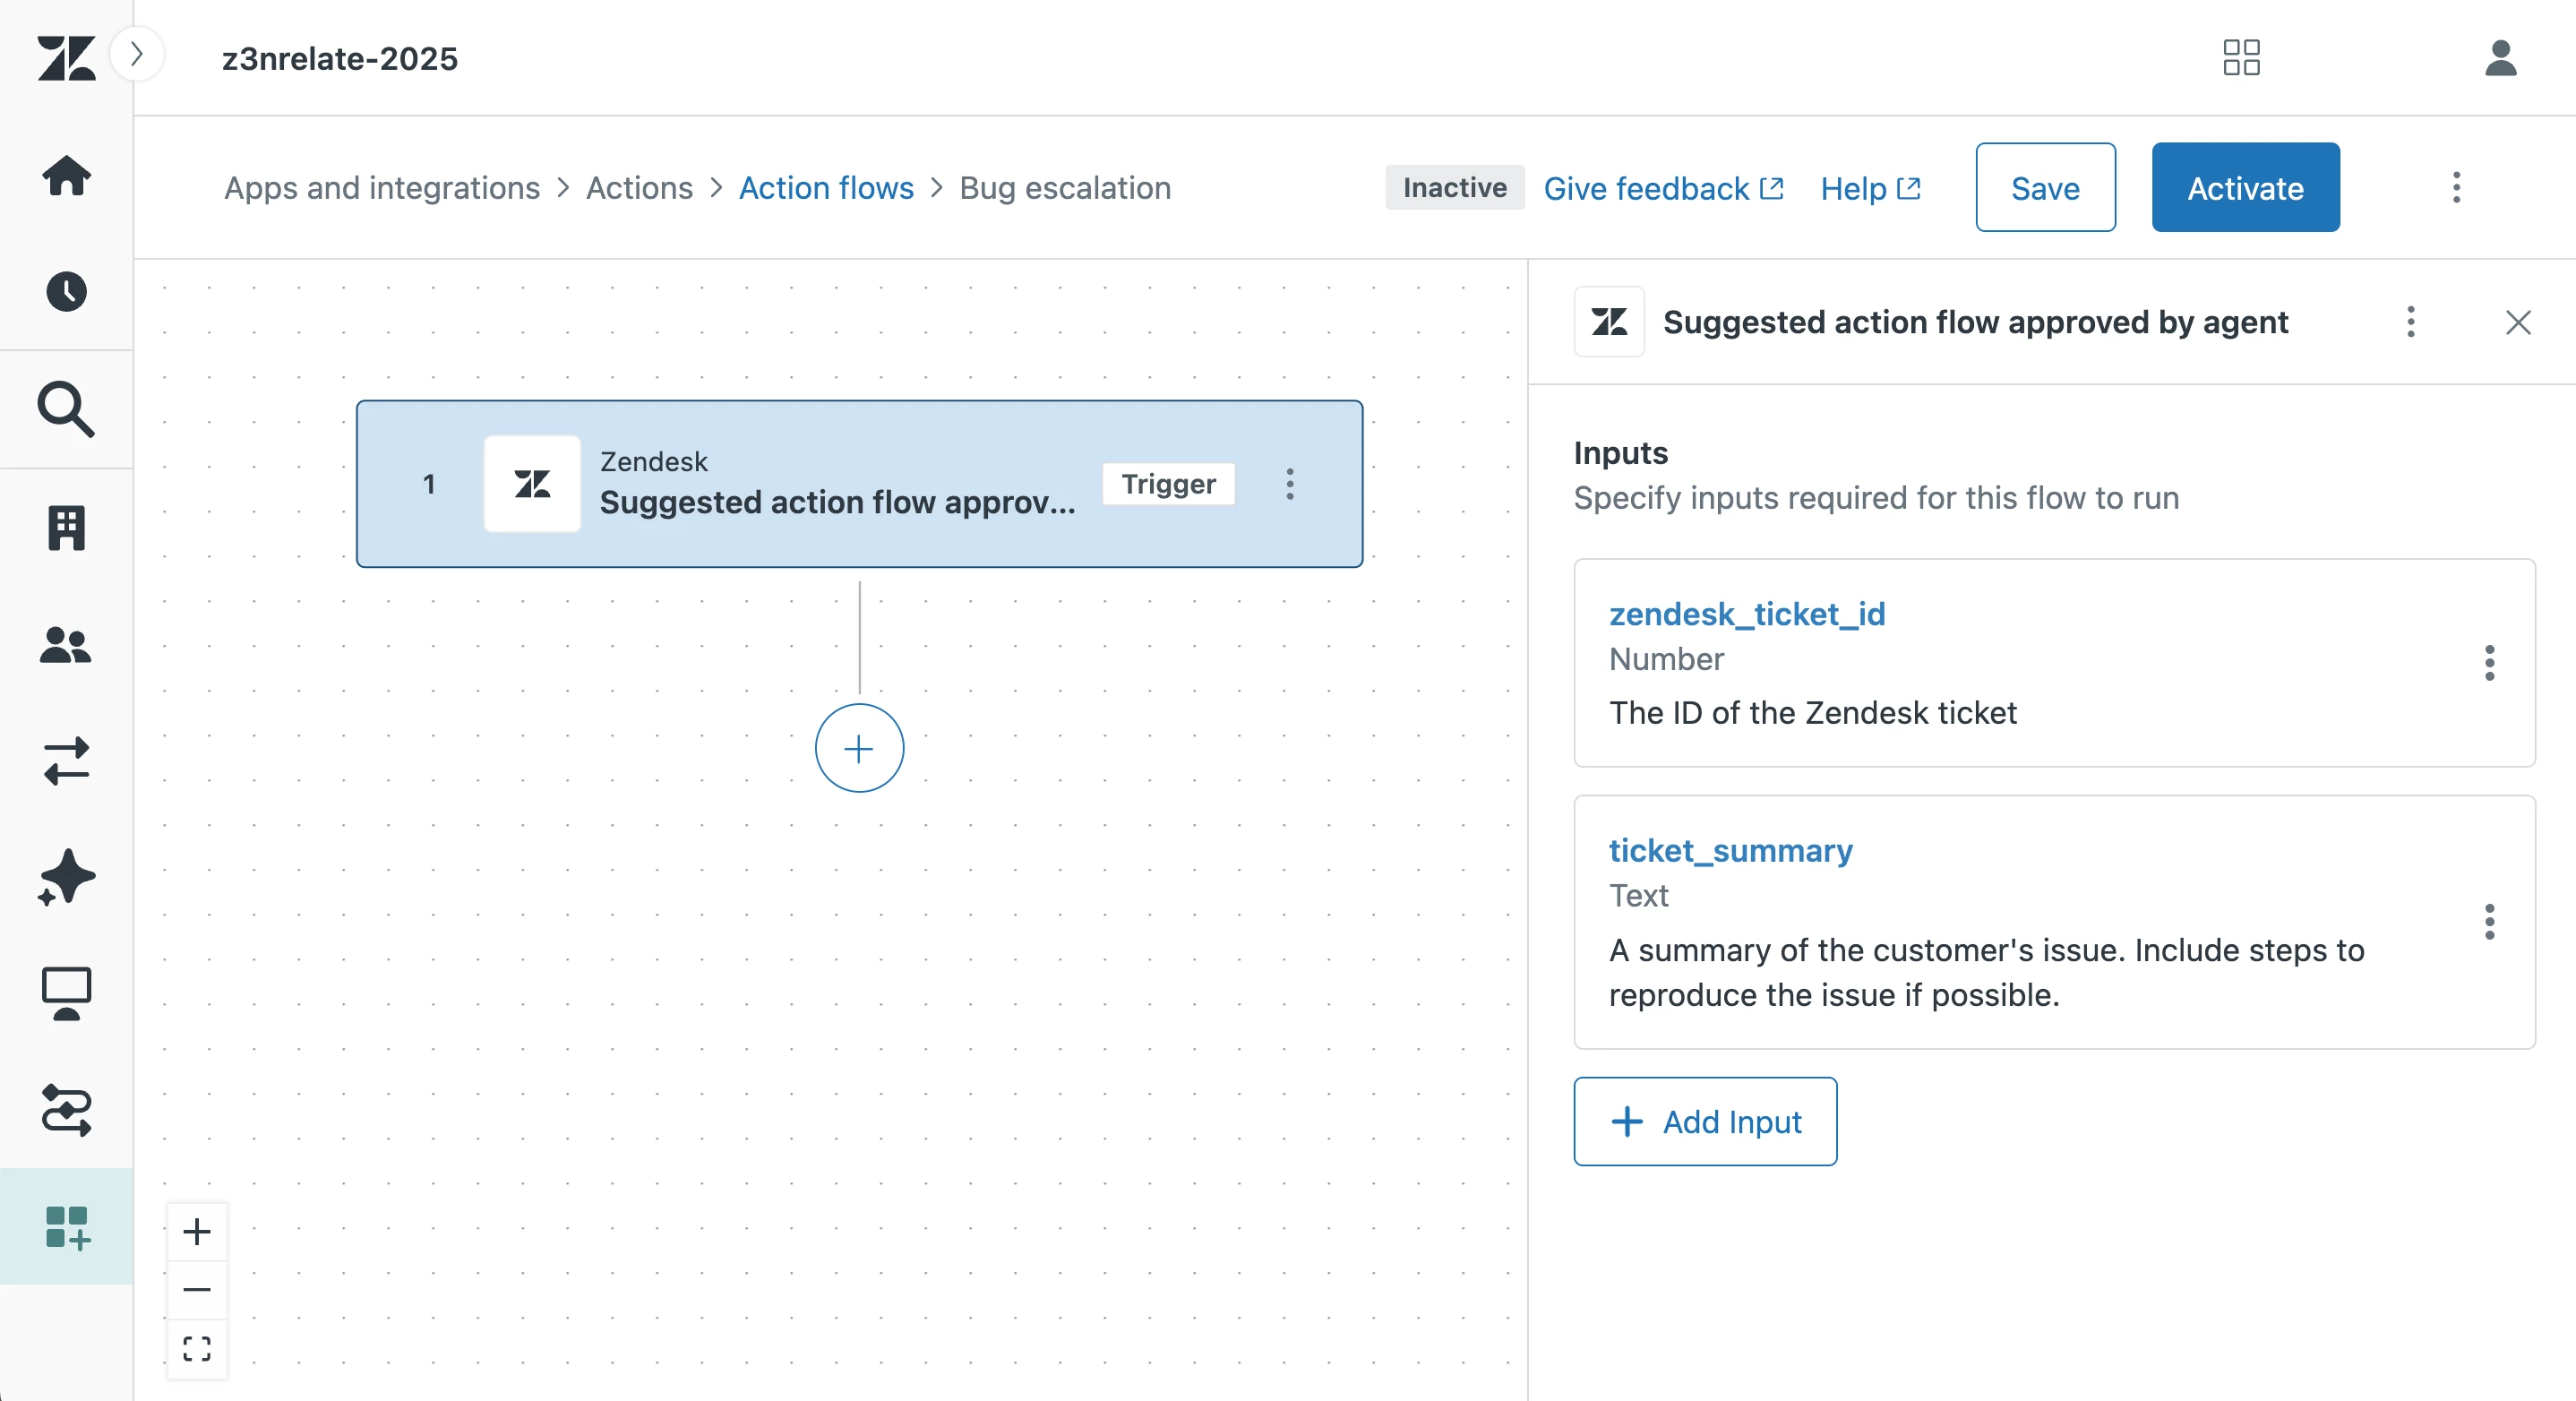
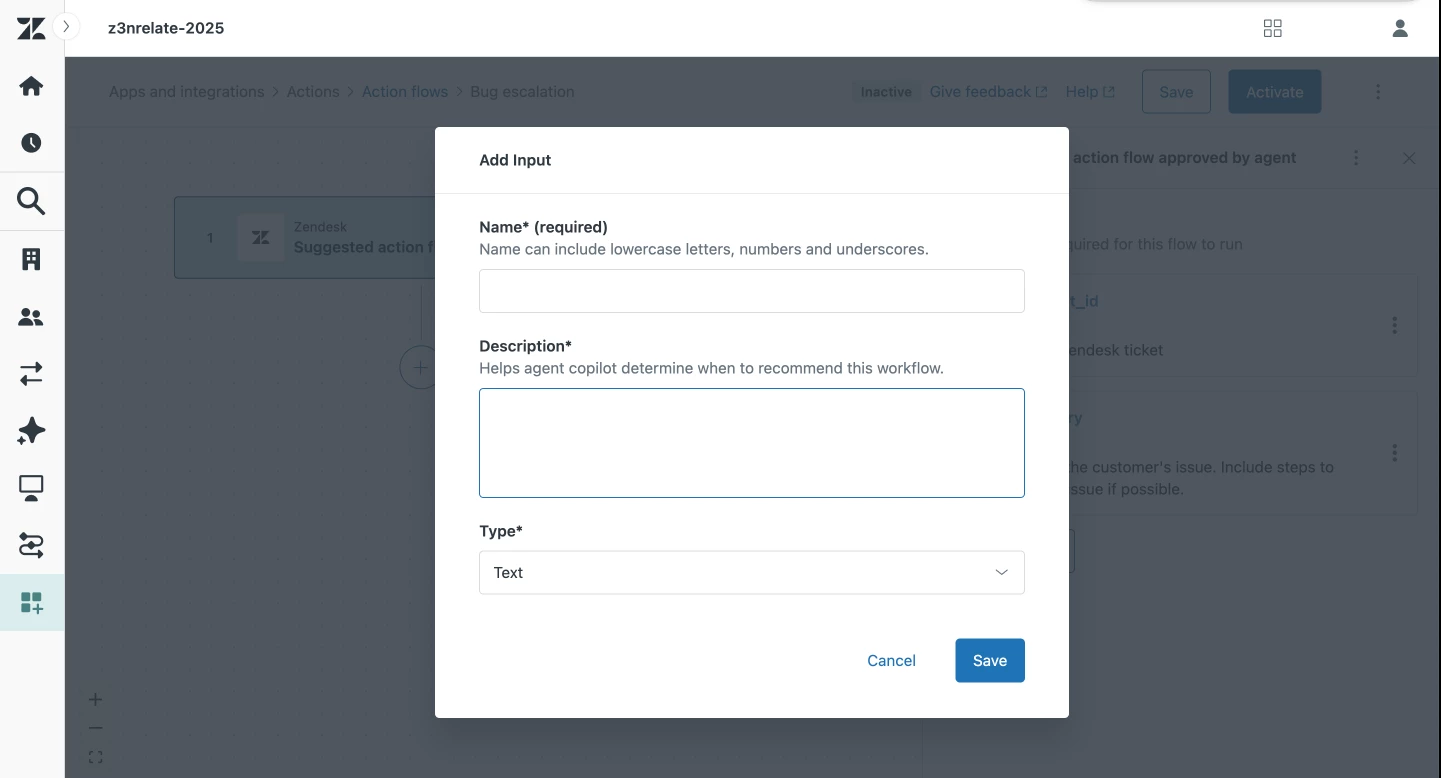
6. Click Add input. Inputs are pieces of information that you want Copilot to provide when the flow is triggered. For example, you can add an input for:
-
zendesk_ticket_id: This is required so that you can use information from the ticket in subsequent steps.* -
ticket_summary: This can be used to have Copilot provide a summary of the ticket. -
webpage: This can be used to have Copilot provide the webpage impacted by the bug report.
*To have Copilot provide the ticket ID, you must name the input zendesk_ticket_id and select the Number data type.
7. From the Add input modal, use lowercase letters, numbers, and underscores to name your input. This is the name that will appear in variable lists. Once you have a name, add a description to help copilot determine the correct information to provide when the flow runs. You will also need to specify the format of your expected input data (ex. Text, number, etc.). Repeat this step for all your inputs.
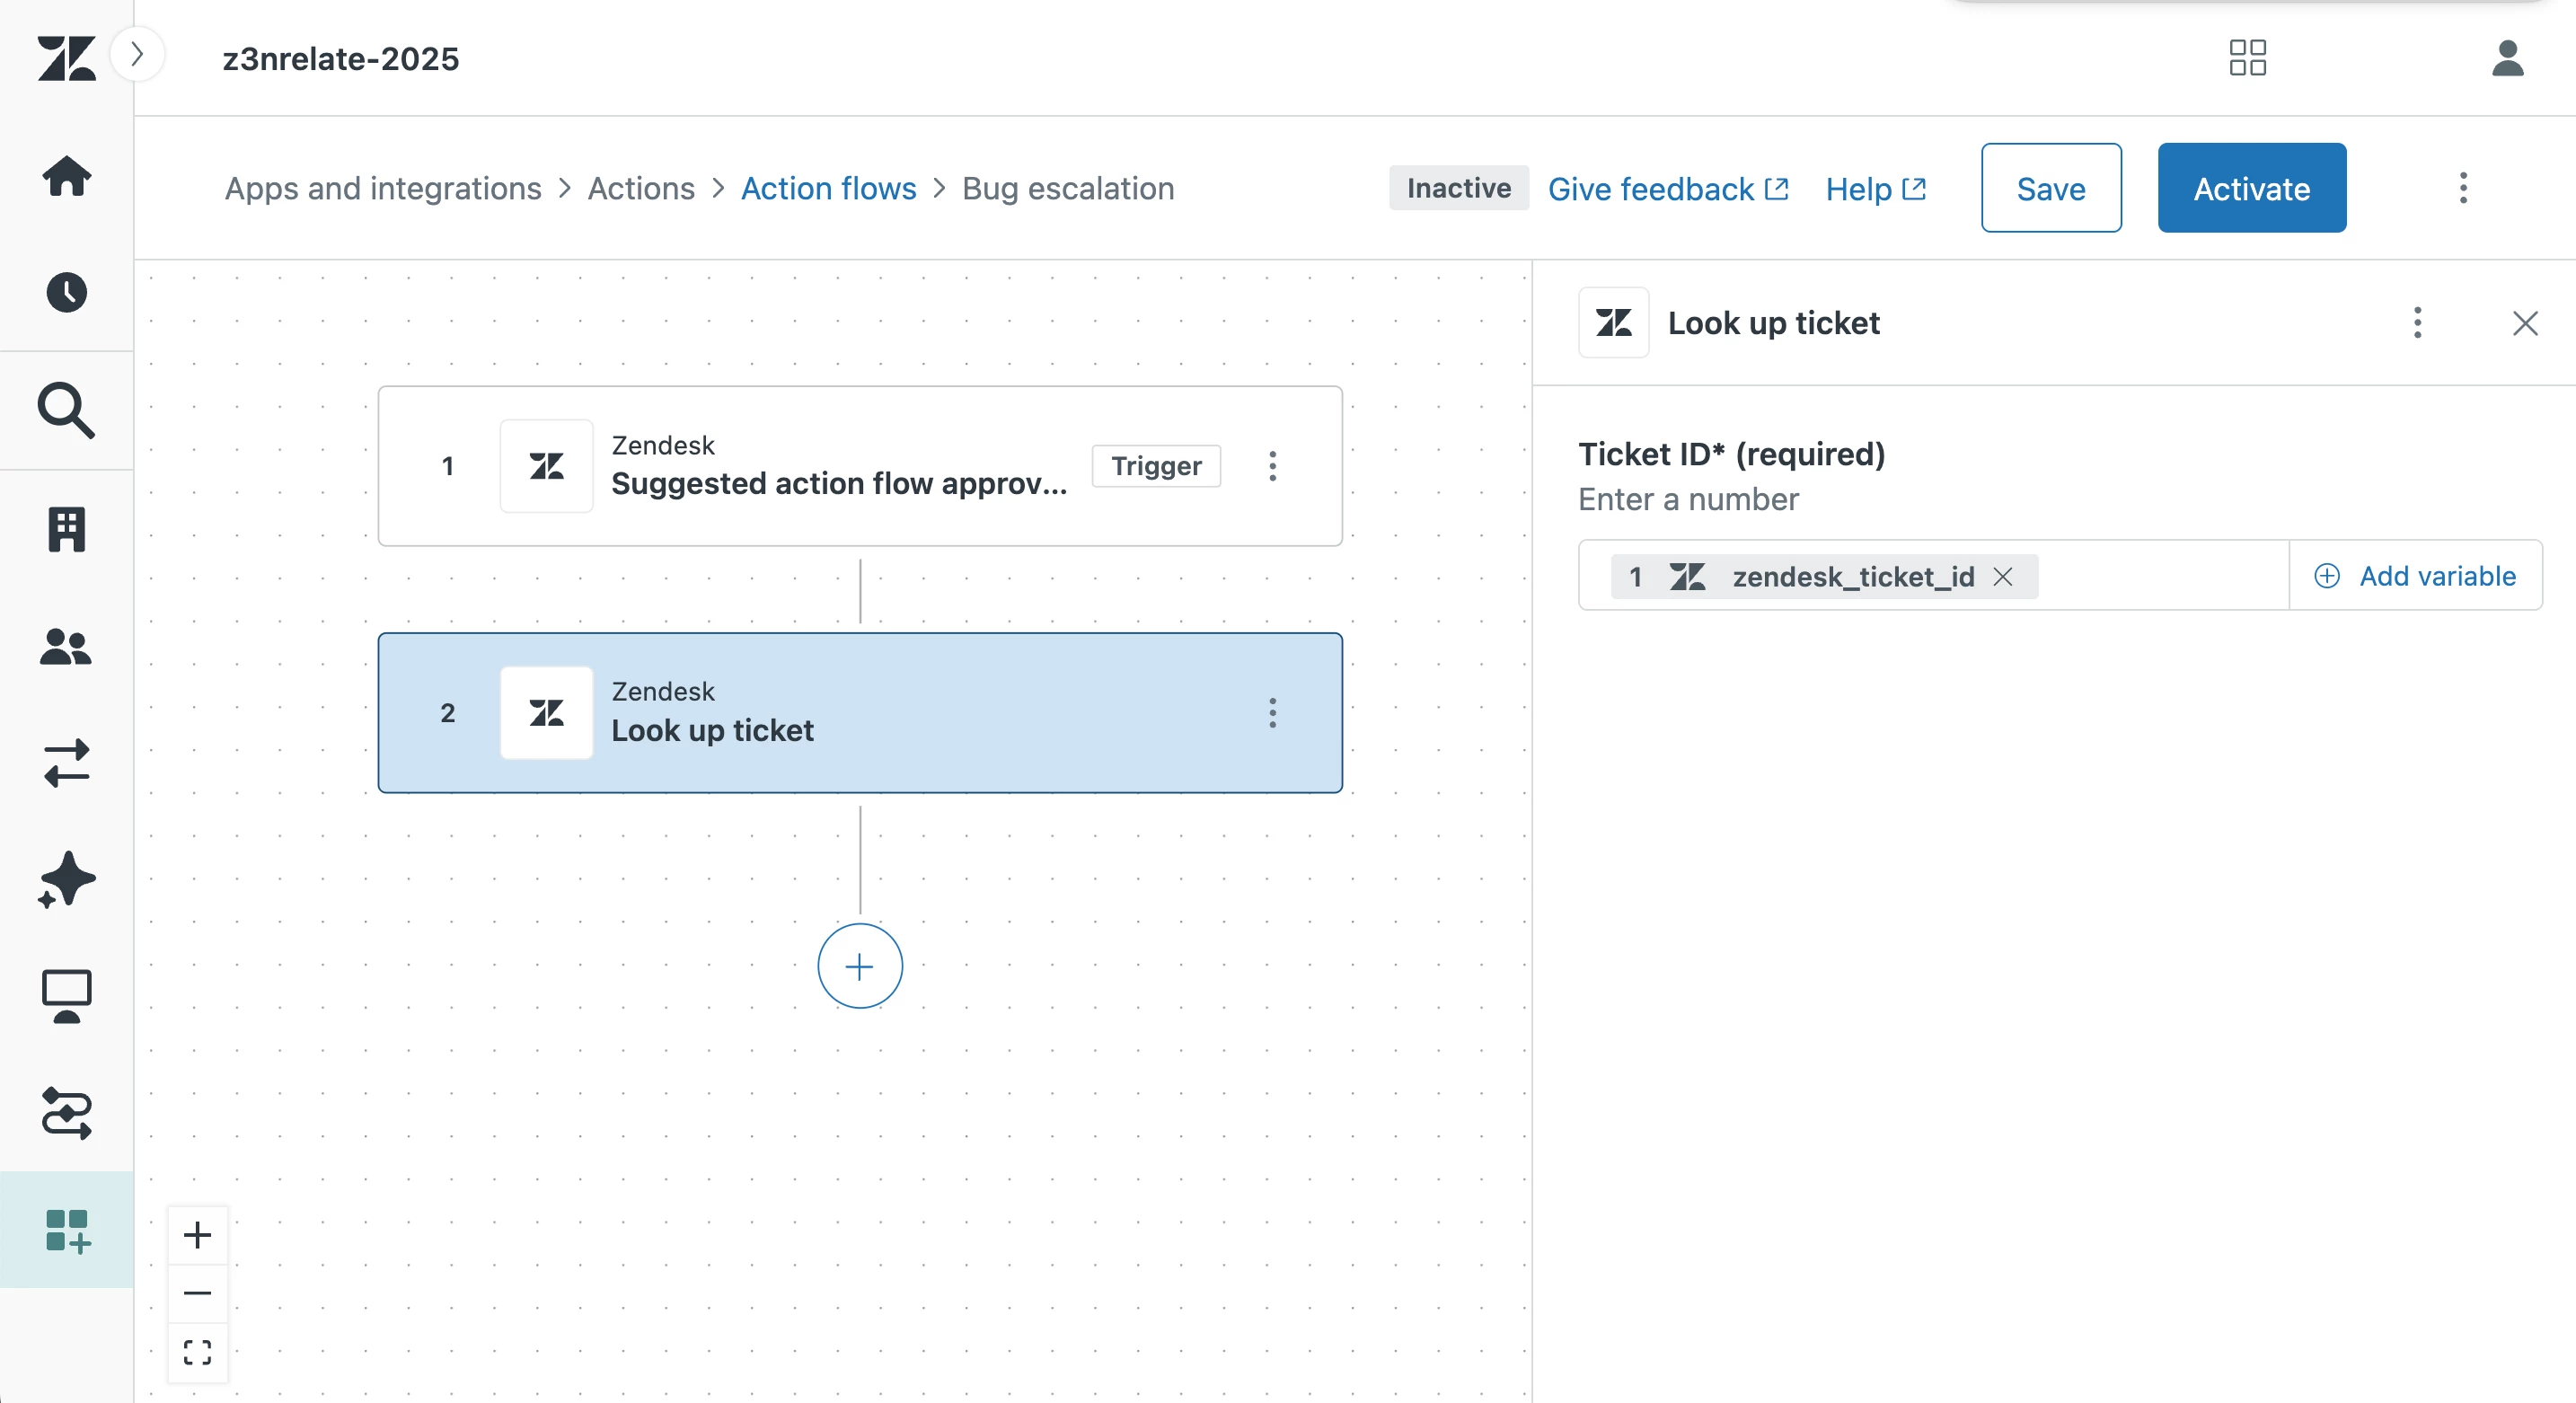
8. Add a step and select Zendesk steps > Look up ticket. This step helps you include additional ticket information in your Jira issue (ex. Ticket ID, description, etc.). A ticket ID will be required to pull ticket information. For this input, click Add variable > Suggested action flow approved by agent > zendesk_ticket_id. This will pull ticket data from the ticket that triggered the flow.
9. Add a new step and select External steps > Jira.
10. If you have not connected the Action Builder to Jira, follow these steps.
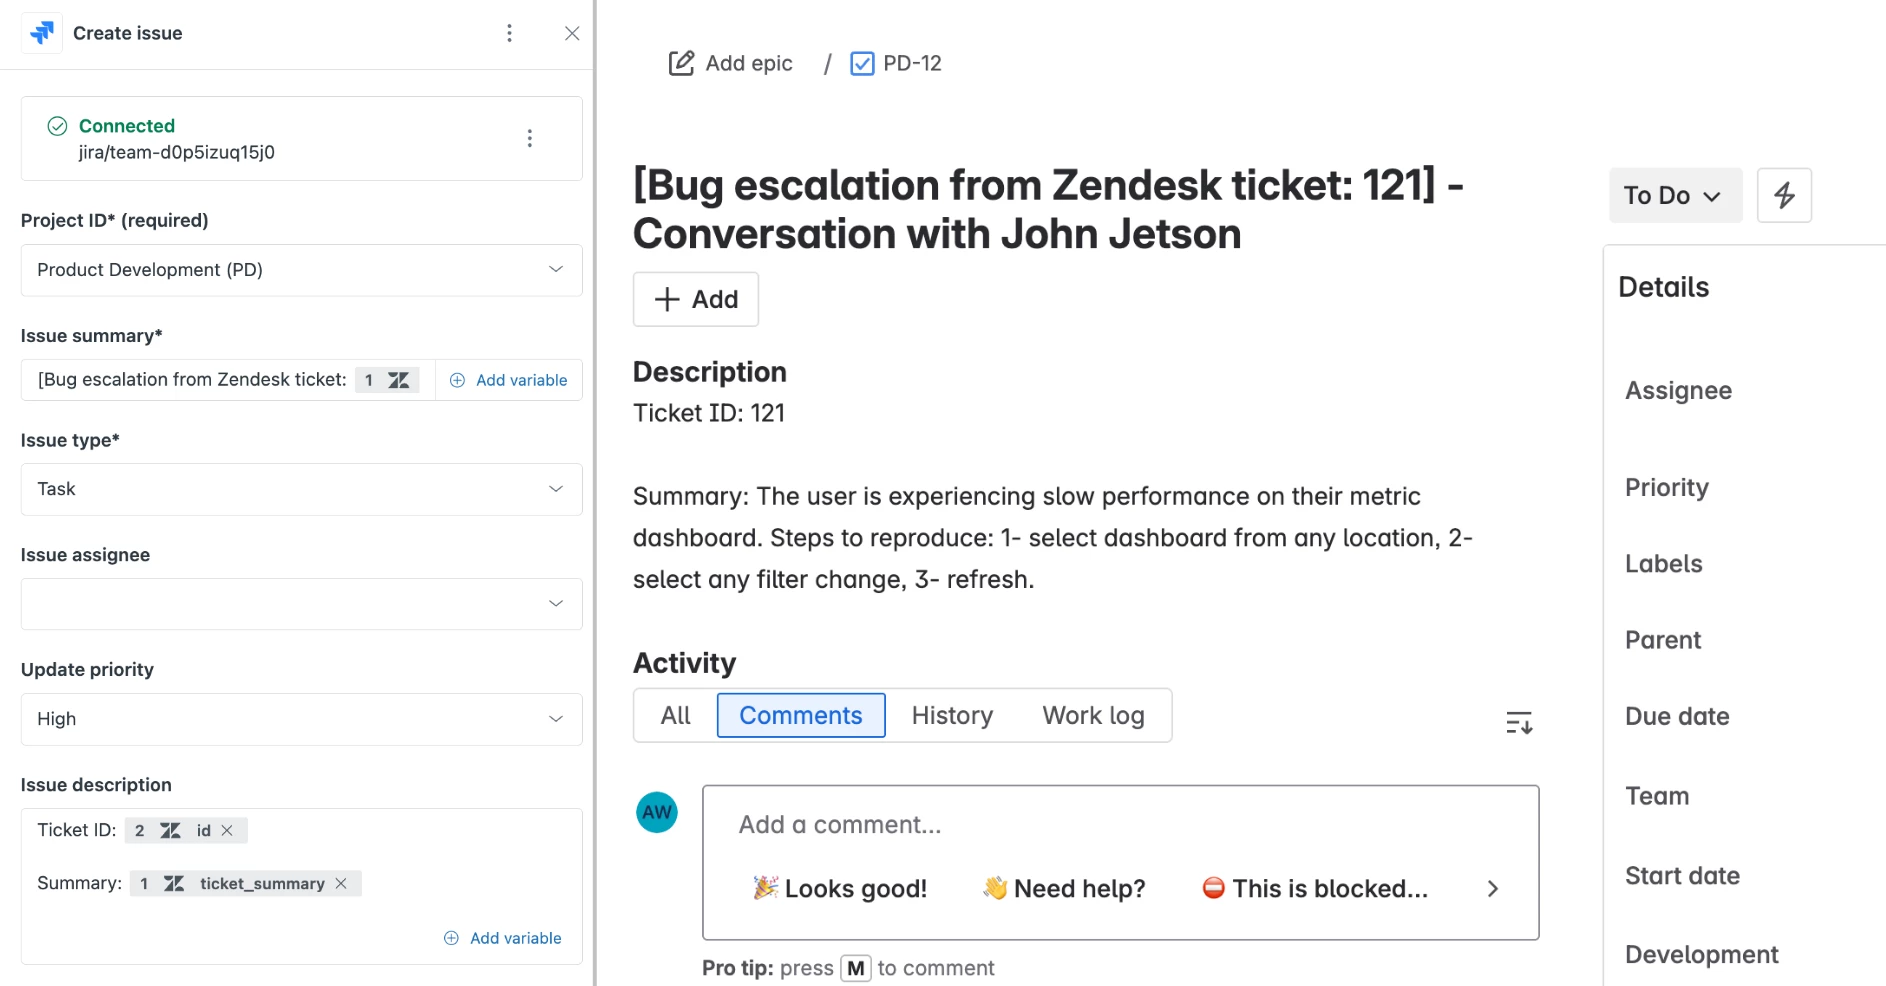
11. After connecting to Jira, select Create issue from the list of prebuilt actions.
12. Complete the required and applicable fields. As a best practice, we recommend using variables to carry over data that is specific to each ticket. For example, you can use Copilot inputs and outputs of other steps as variables to include:
- The Zendesk ticket ID (Look up ticket > id)
- A ticket summary (Suggested action flow approved by agent > ticket_summary)
- The impacted webpage (Suggested action flow approved by agent > webpage)
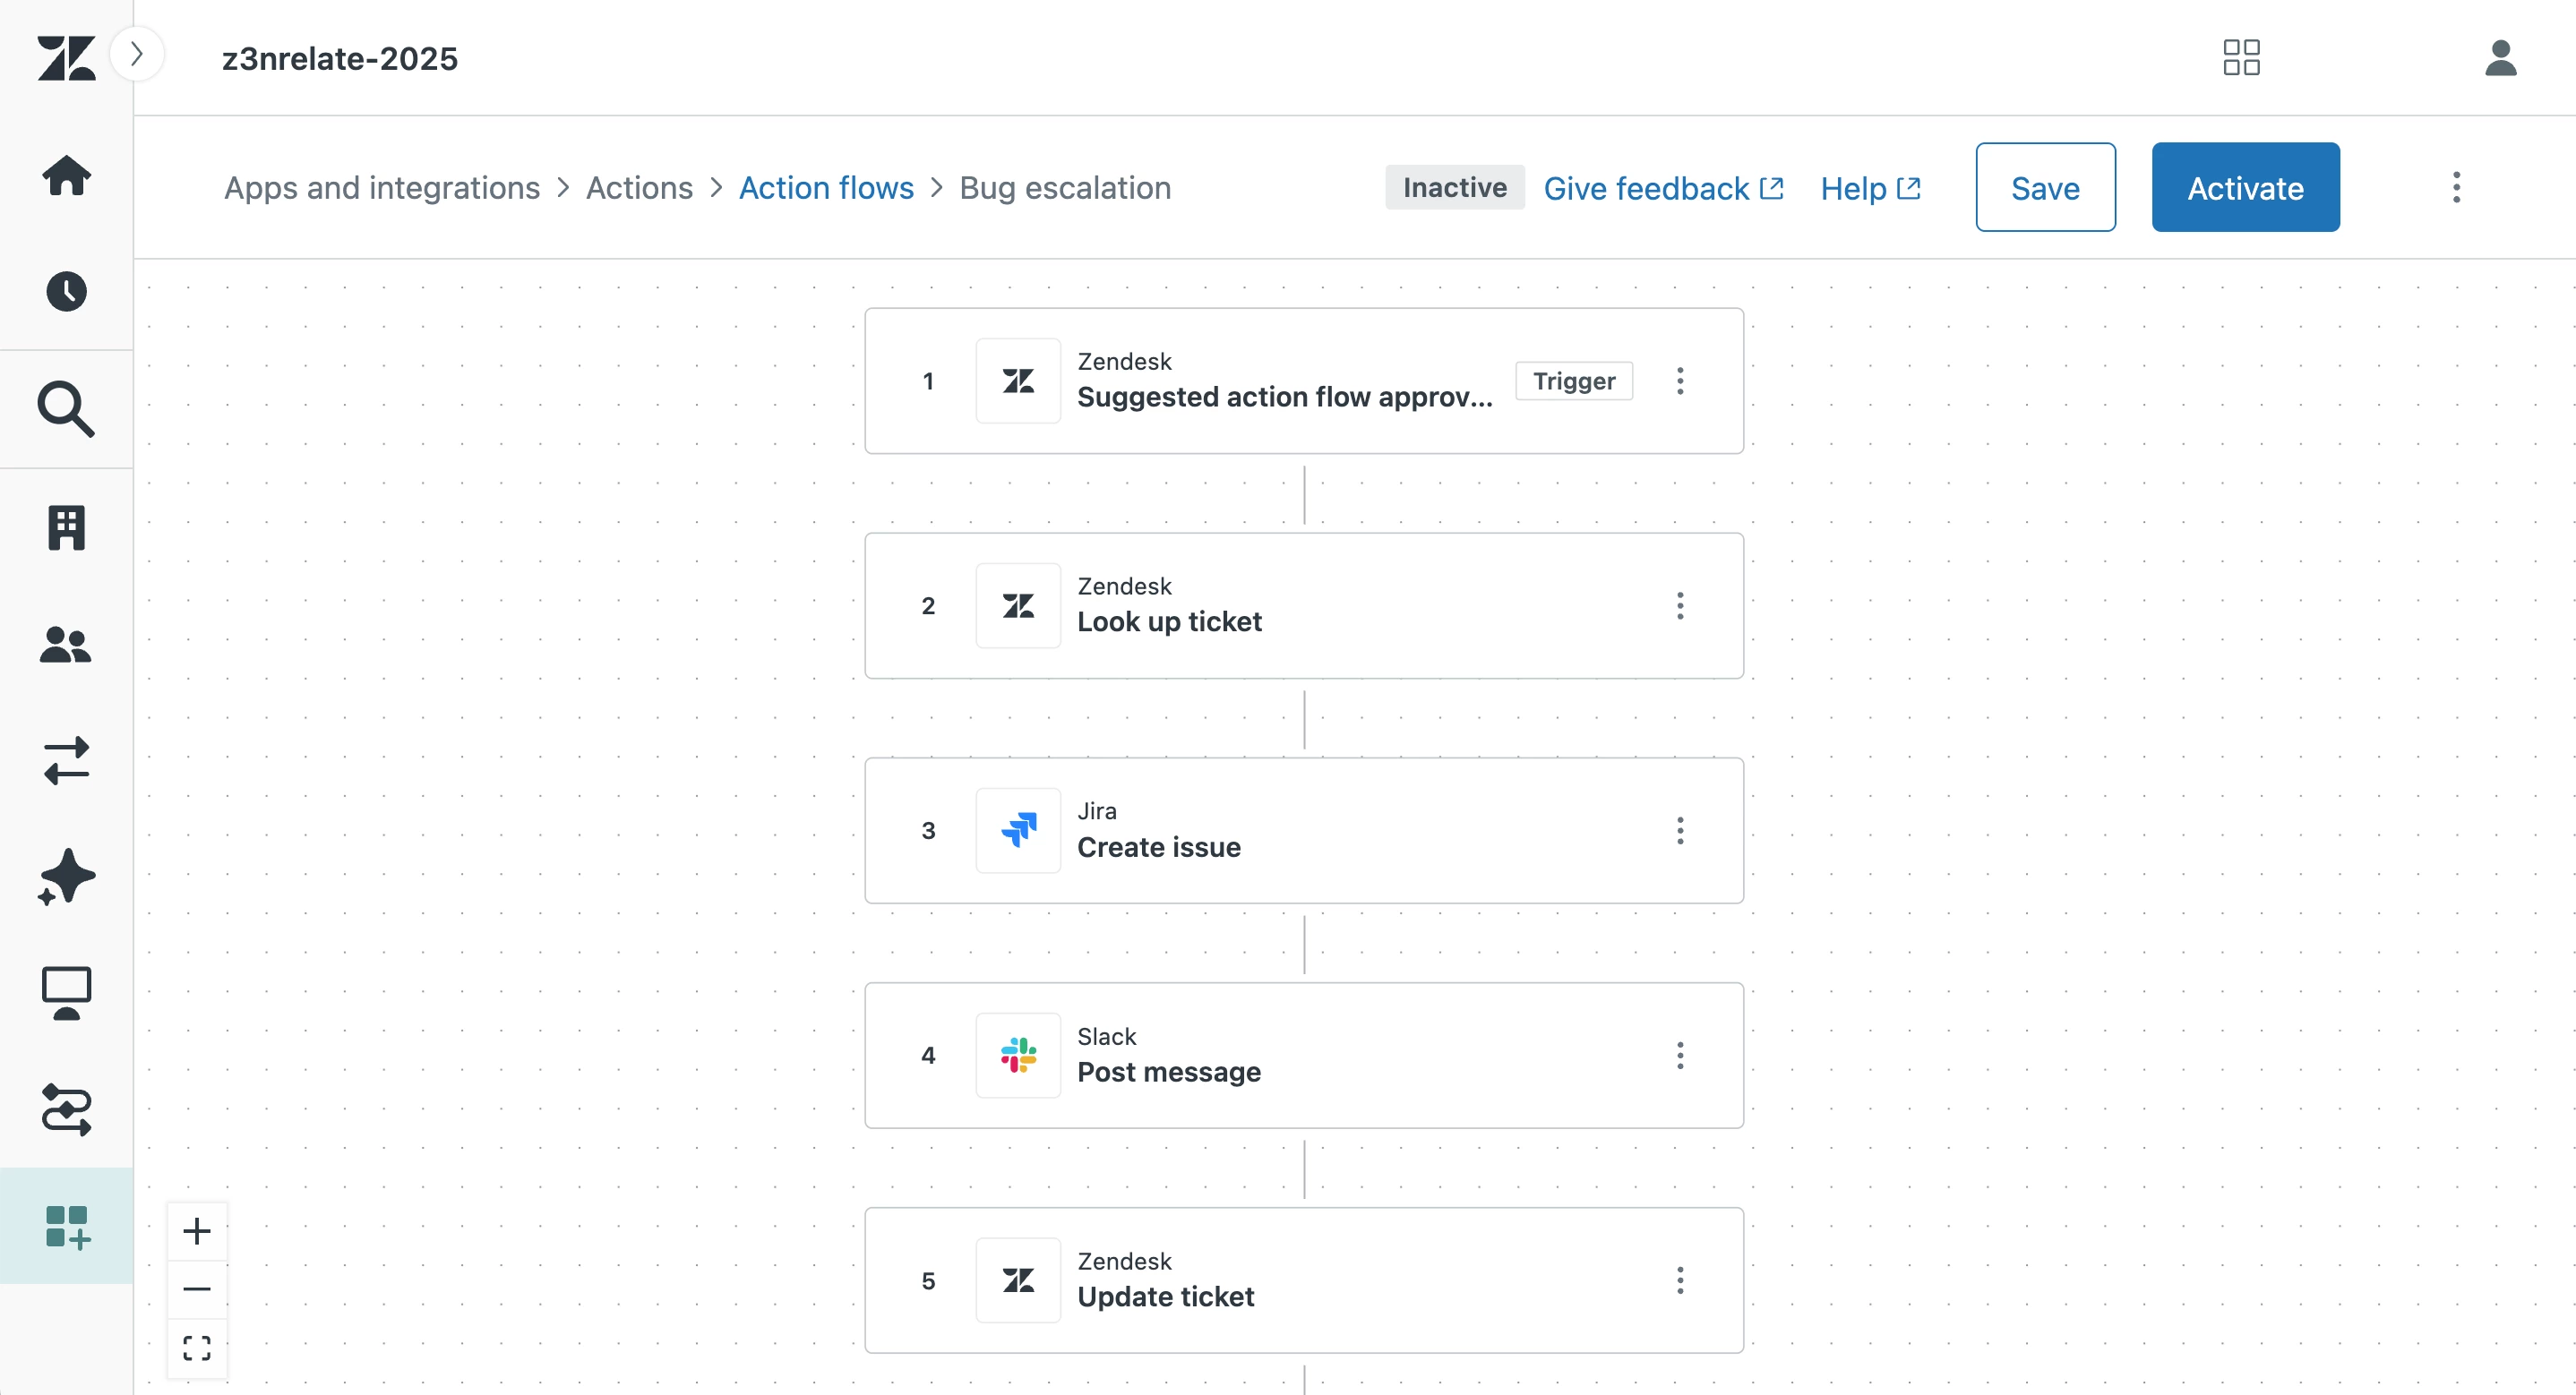
13. The following steps are optional but recommended for internal collaboration. For example, to proactively notify developers about the new issue, add a step and select External steps > Slack.
14. If you have not connected the Action Builder to Slack, follow these steps.
15. After connecting to Slack, select Post message from the list of prebuilt actions.
16. Select your development team’s Slack channel and include a message. For example, you can use variables to include:
- The Zendesk ticket ID (Look up ticket > id)
- A link to the Jira issue (Combine your URL with the Jira: Create issue > key variable)
- A link to the Zendesk ticket (Combine your URL with the Ticket created > id variable)

17. To notify agents about the new Jira issue, add a step and select Zendesk steps > Update ticket. A ticket ID will be required. For this input, click Add variable > Look up ticket > id to ensure the correct ticket is updated.
18. Under Comment, add a note informing agents about the flow. For example, “The development team has been notified about the issue via Slack. You can track the Jira issue at https://jira-example.atlassian.net/browse/[jira.key]". To correctly setup a URL, combine your Jira URL with the Jira: Create issue > key variable.
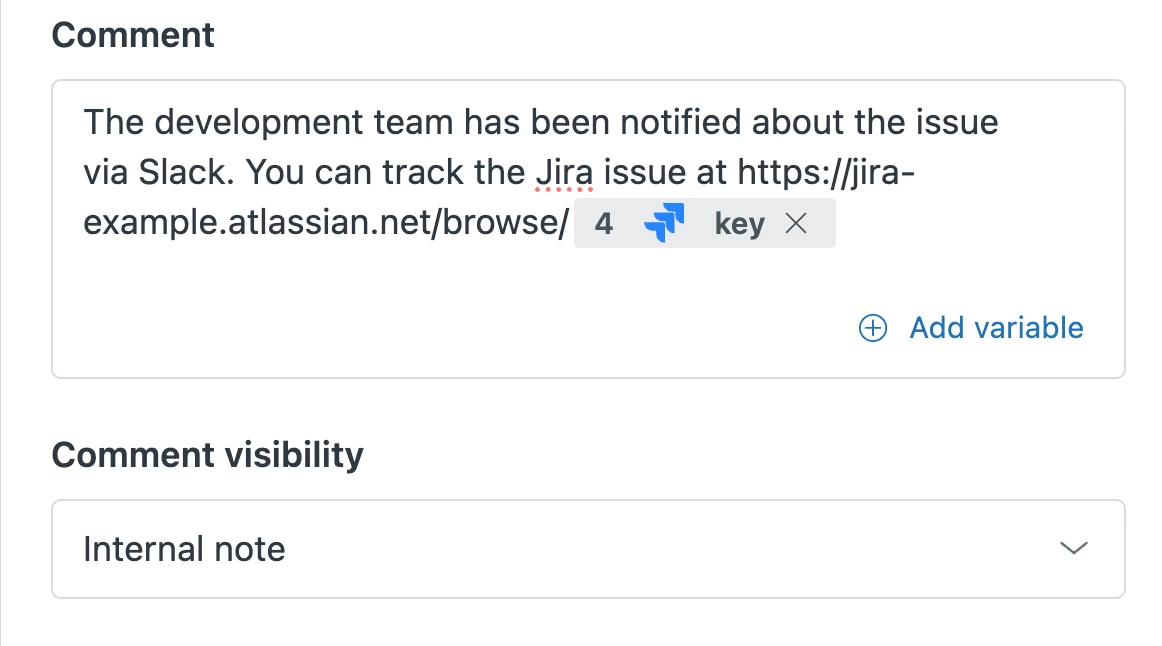
19. Under Comment visibility, select Internal note.
20. Save your flow prior to activating.
21. Once your flow is saved, it can be used in a Copilot procedure. Navigate to the Knowledge admin center and click Manage articles > Lists > Content objects > Procedures.
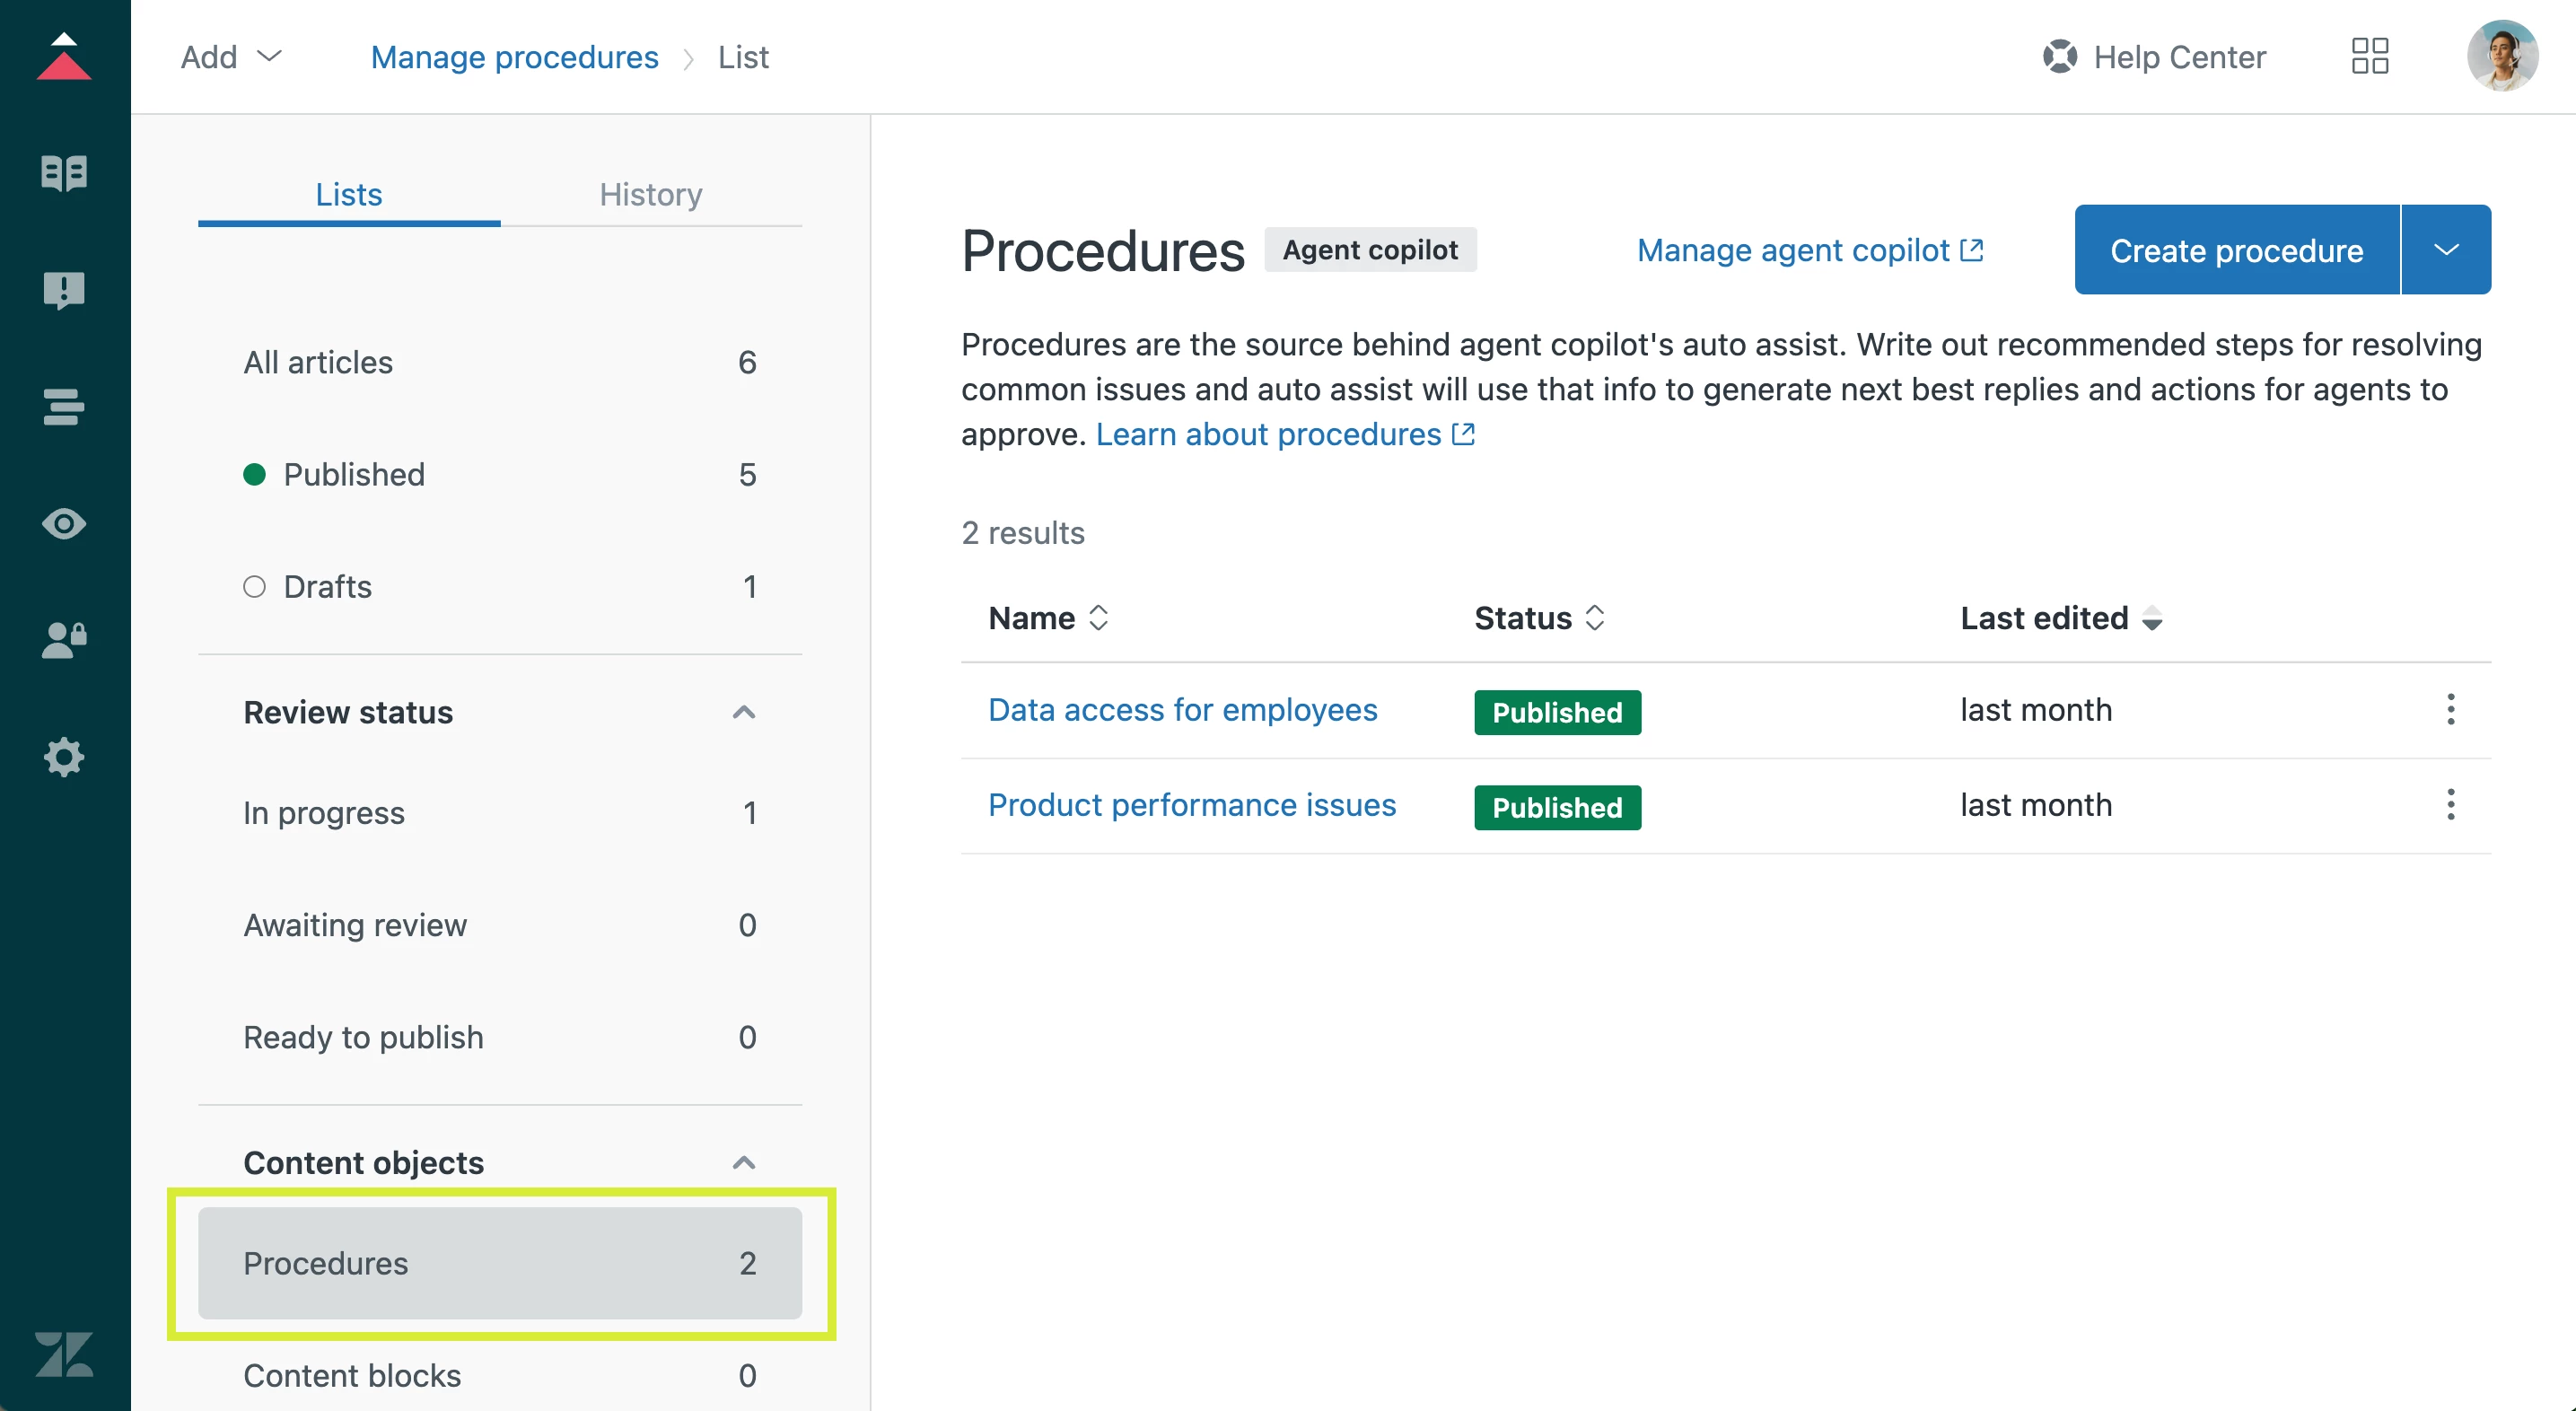
22. Click Create procedure in the upper-right corner.
23. Name your procedure and use everyday words to describe your procedure. For example:
Step 1: Ensure necessary information is provided
When a ticket is raised where a customer is encountering performance issues with the product such as slow response & loading times or lagging in the user interface, check to see if they have provided steps to reproduce the issue. If this information is not included in the request, obtain it from the customer.
Step 2: Action the requestFollow the product development escalations flow (including a summary of the issue and steps to reproduce) and advise the customer that a request has been escalated to the product development team responsible and they will look into it as soon as possible. Submit the ticket as pending.
24. Publish your procedure.