How to "Send Later" Using Automations | The place for Zendesk users to come together and share
Skip to main content
January 30, 2018

How to "Send Later" Using Automations

  • January 30, 2018
  • 29 replies
  • 417 views

I've figured out how to schedule replies in Zendesk!!

Using a combination of triggers, tags, automations, and ticket types, it actually is possible to send with an approximate delay.  Because automations run only once each hour (at the same time every hour for your own account), this won't be exact; it's accurate to within about an hour.

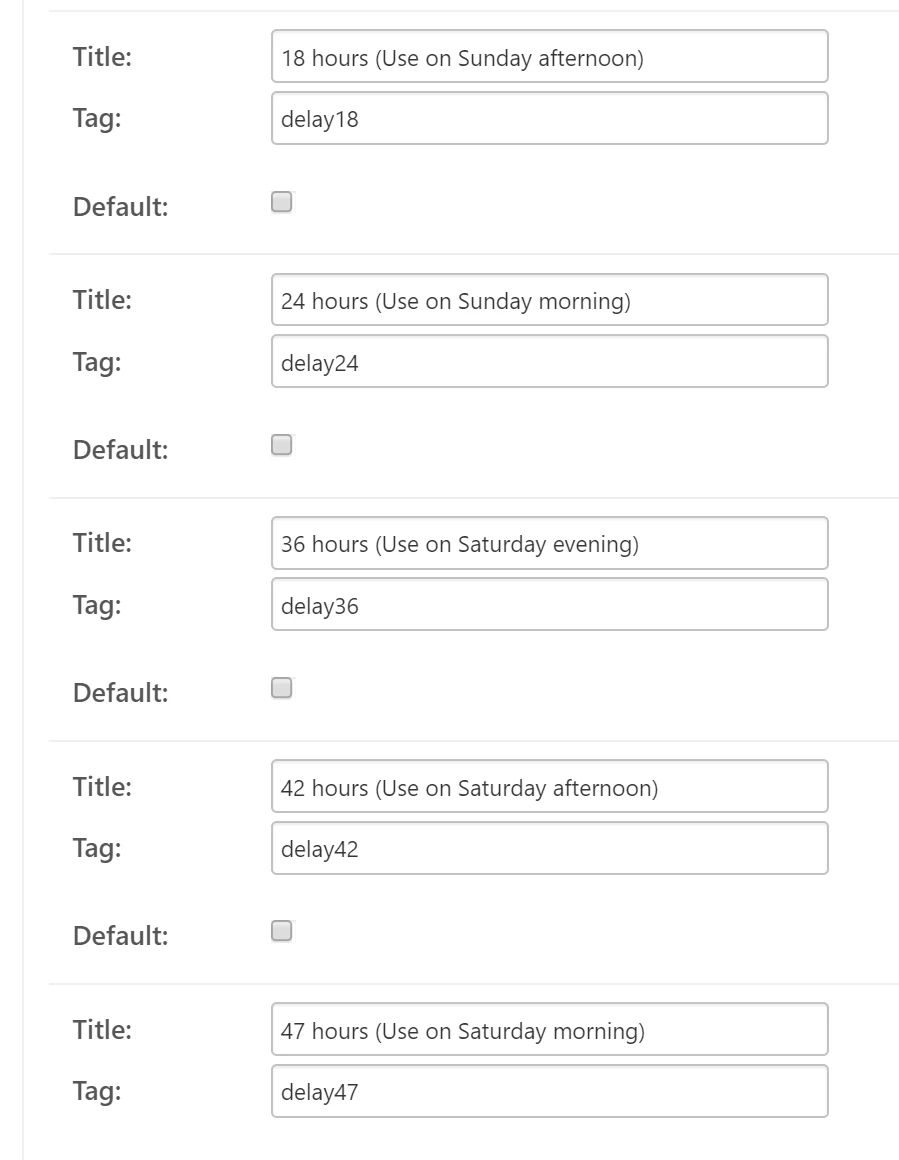
For example, if I'm replying on Saturday morning (but I don't work weekends!), I can delay the email 47 hours to have it sent Monday morning.  Similarly, if I work Sunday afternoon, I can set the email to wait 18 hours and show up on Monday morning...and so on.

Here's how to set it up:

Step 1: Decide what your tags will be to manage this

I used "delay1", "delay2", etc. Adjust these times based on when you're likely to be writing replies, and when you want the emails to be sent.

I've set up my preset delays to be 1, 2, 4, 8, 12, 18, 24, 36, 42, and 47 hours.  This will allow me to work any time I want, and then have the email be sent at a time that's appropriate.

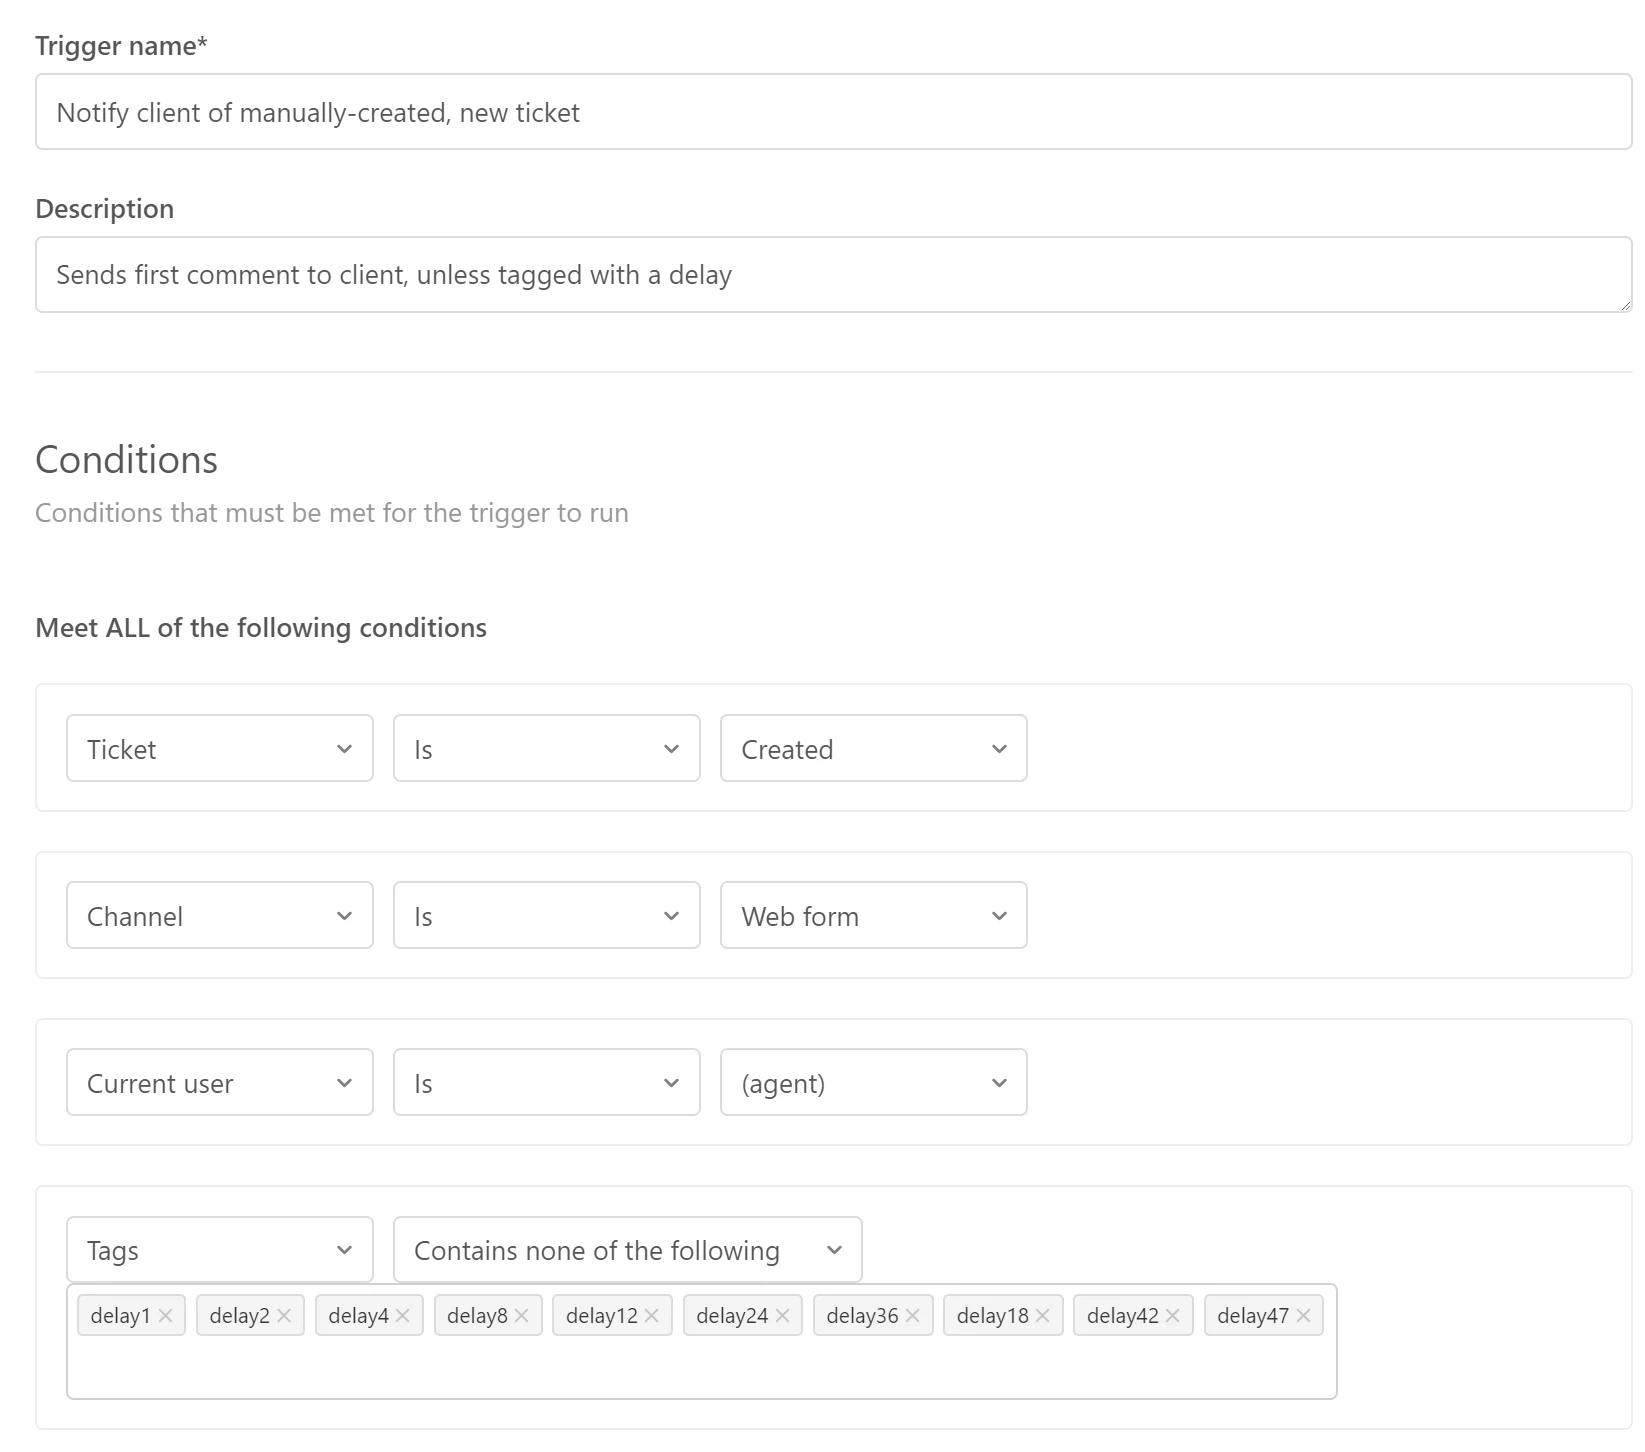
Step 2: Edit your existing client notification triggers to NOT send if they include one of those tags

Be sure to add this to all triggers that send a reply to your clients, as you may have several.

Use the Condition "Tags ... Contains none of the following" and enter all of your new tags.
Step 3: Create a new automation for each tag/delay

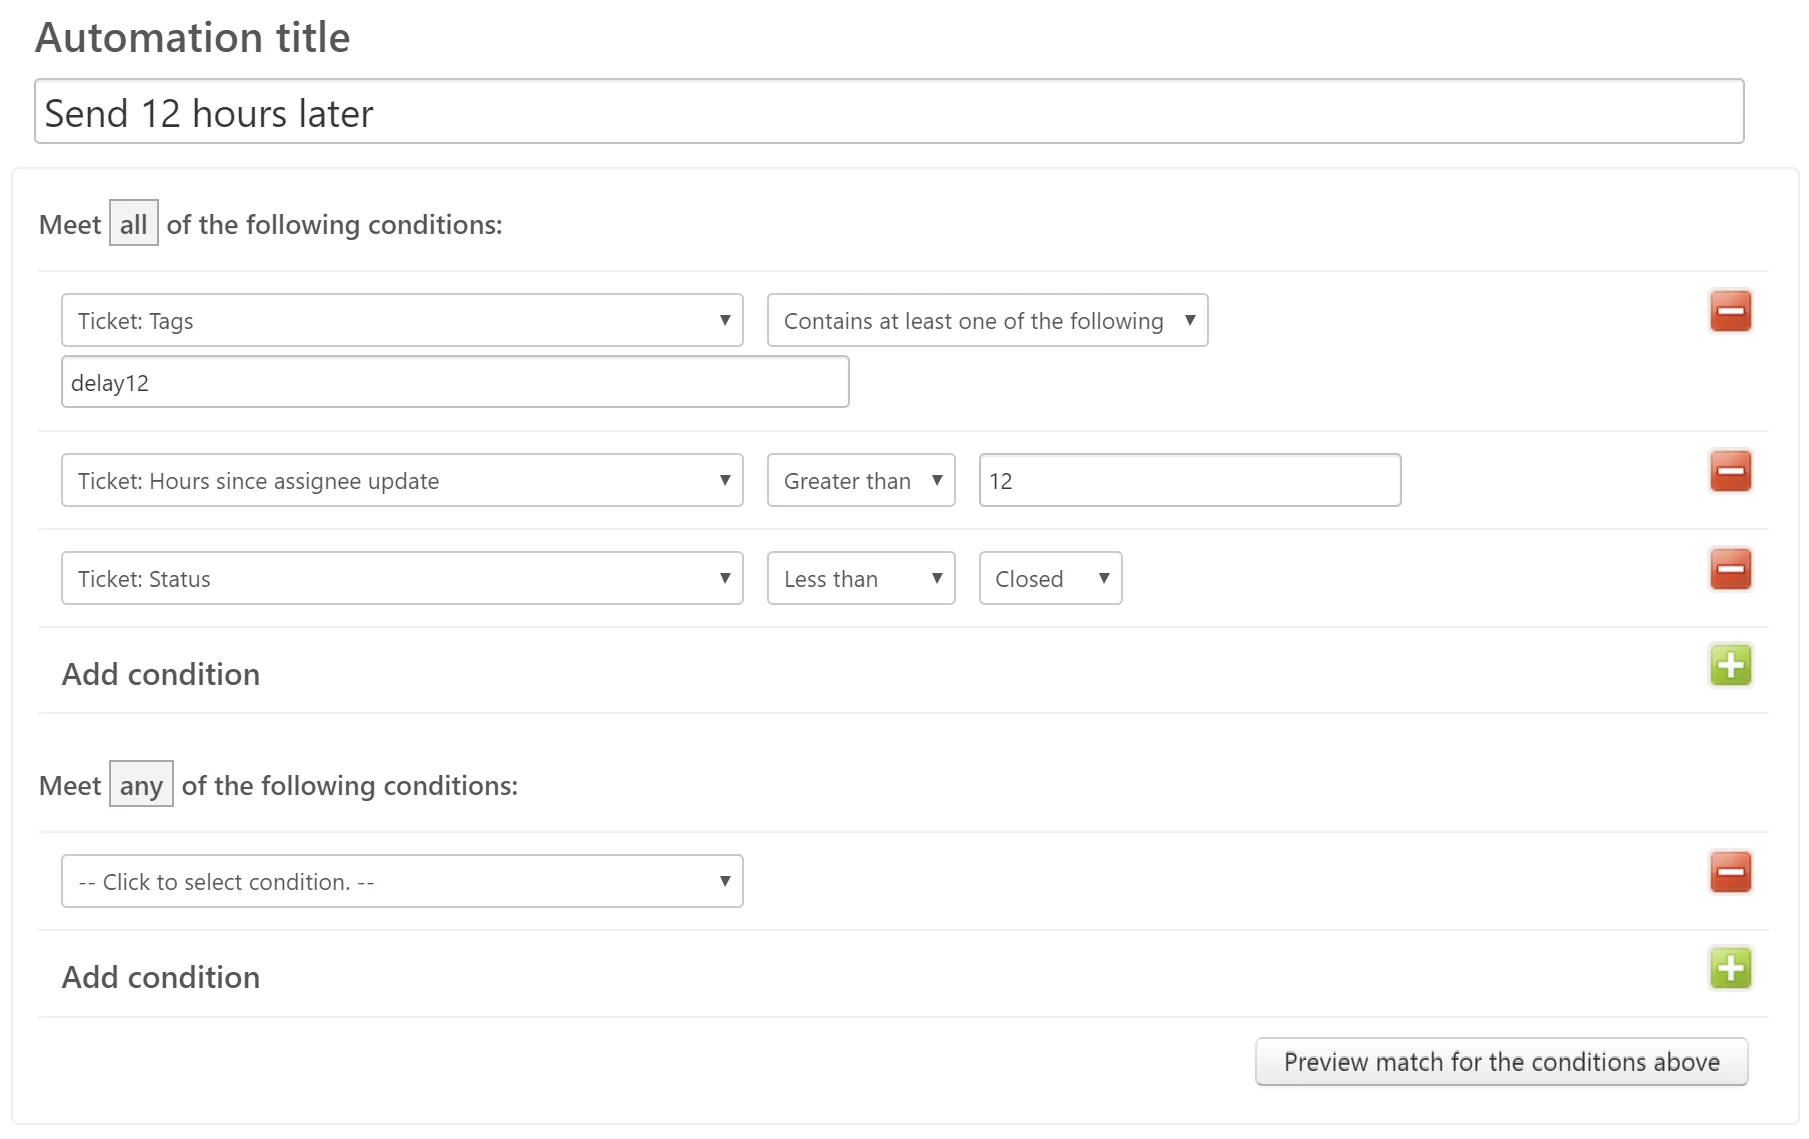
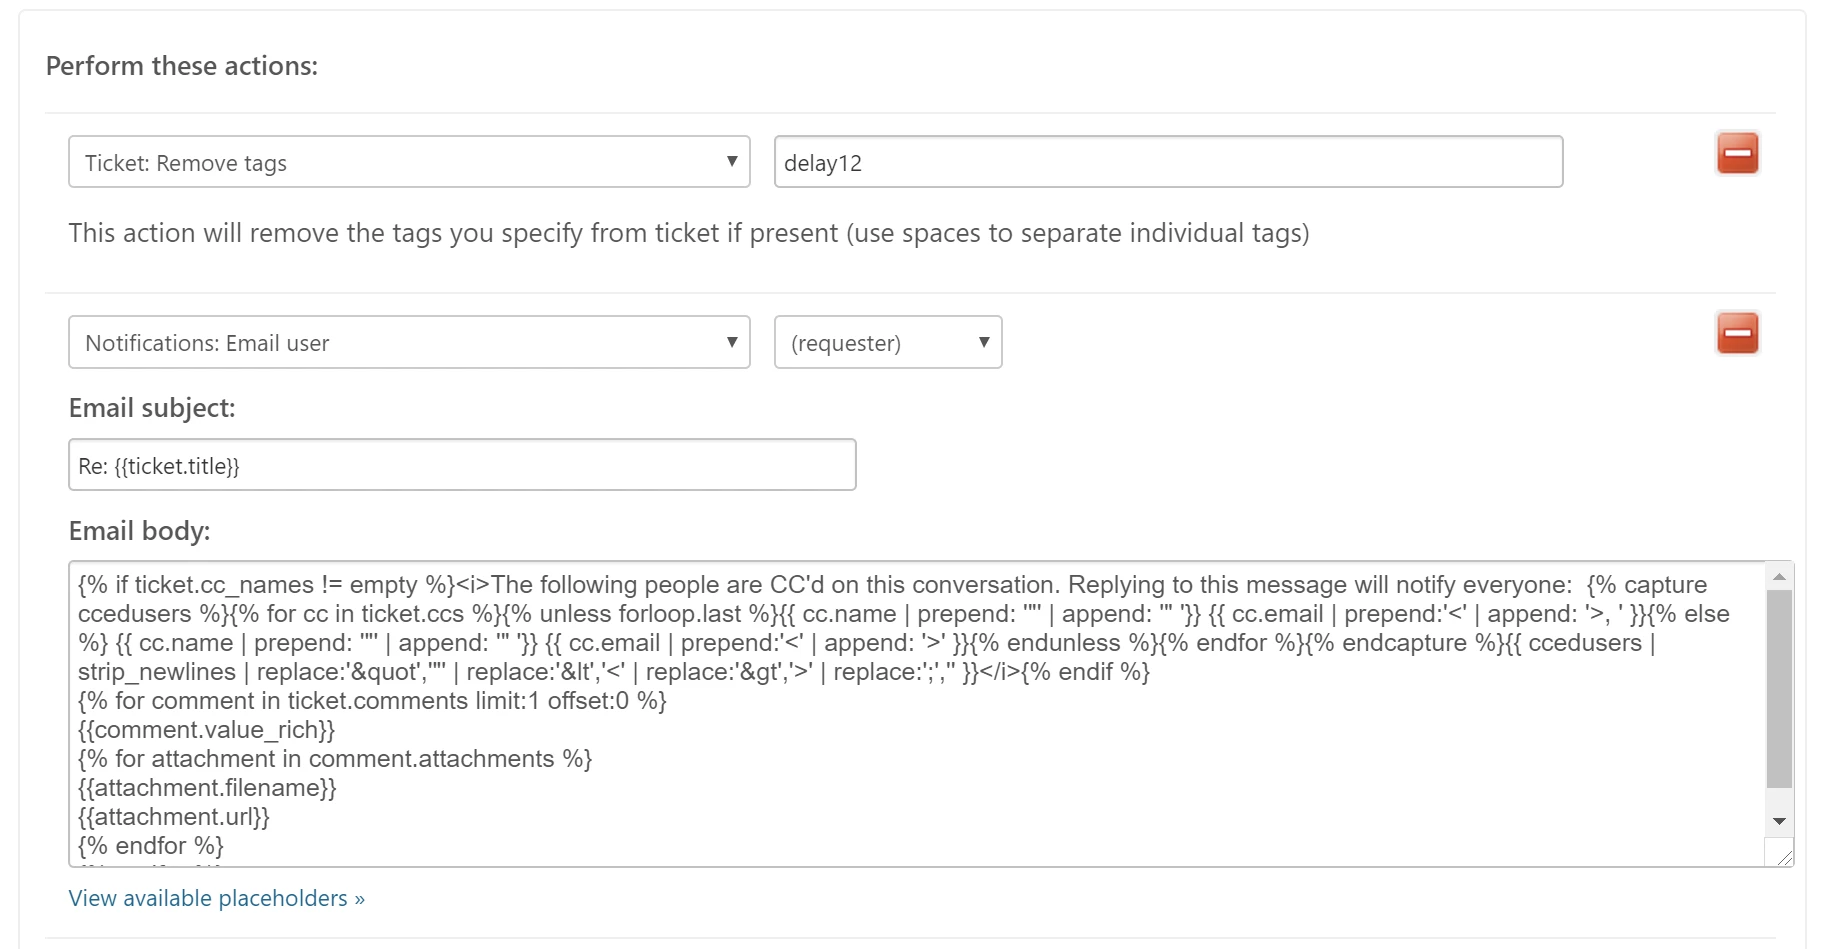
This will send the email after enough time has elapsed. Here's my setup for 12 hours (for other delays, just change the numbers accordingly). Note that the Email body was copied & pasted from the original trigger that sent the notification.
Step 4 (Optional, but highly recommended): Set up a custom Ticket Field to provide a drop-down with the delay options

This will make it easier and less error-prone, as you won't have to manually type in a tag. 
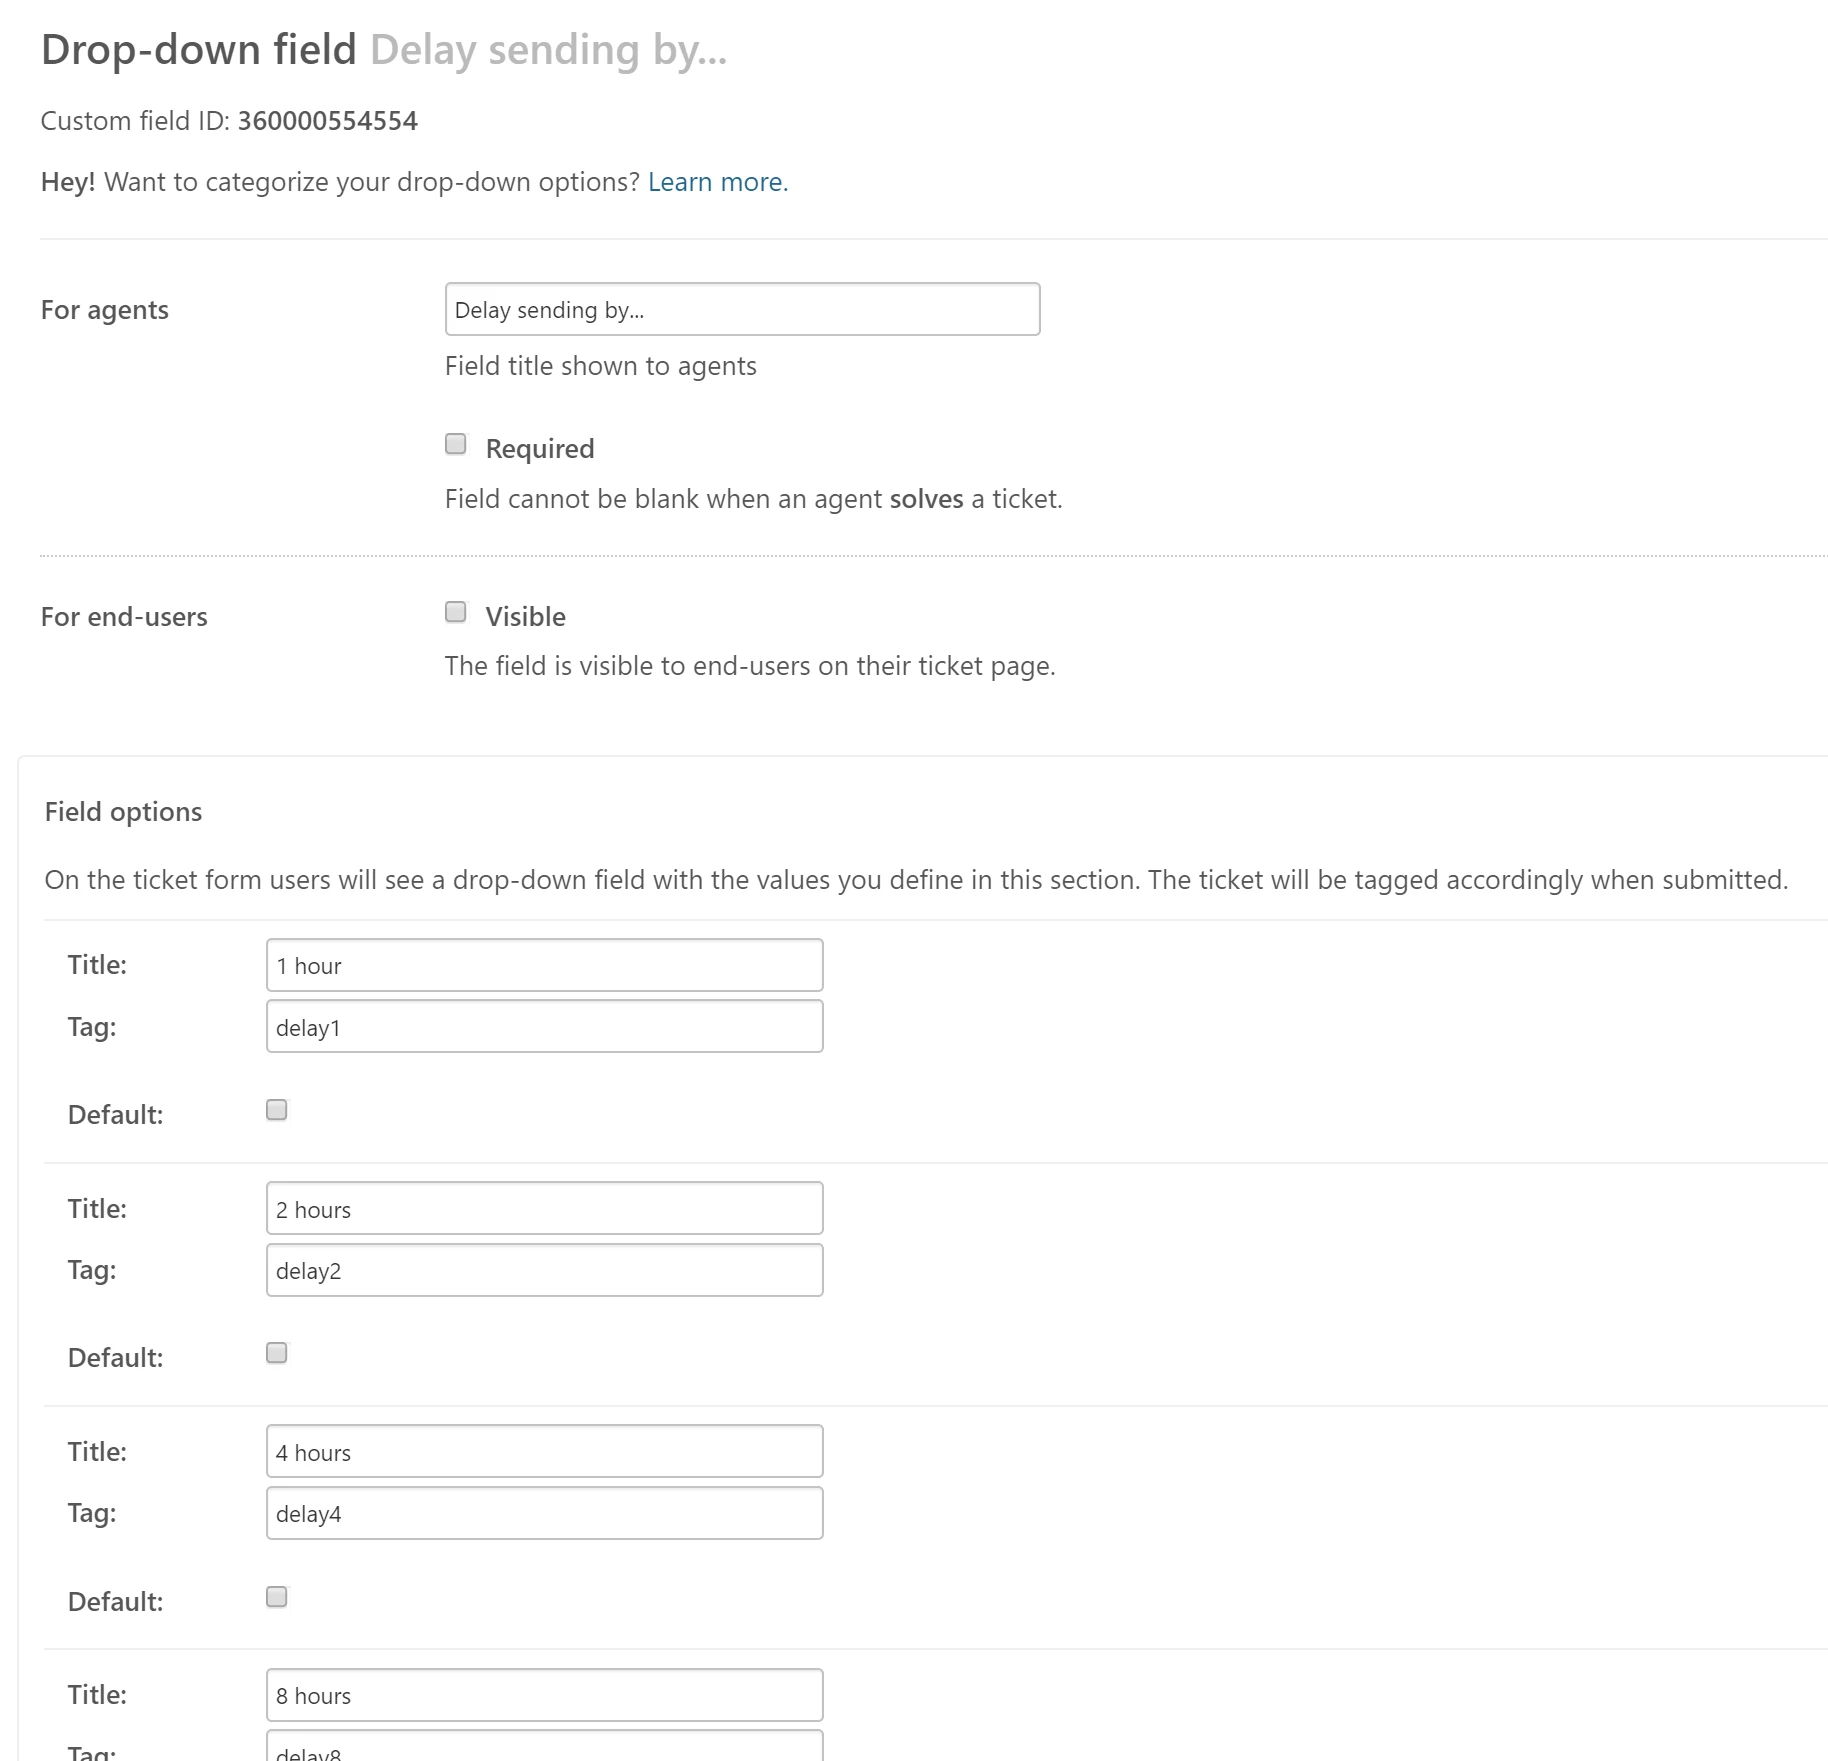
For delays over 12 hours, I also added a note to suggest when to use which delay (assuming I want the actual reply to go out Monday morning):
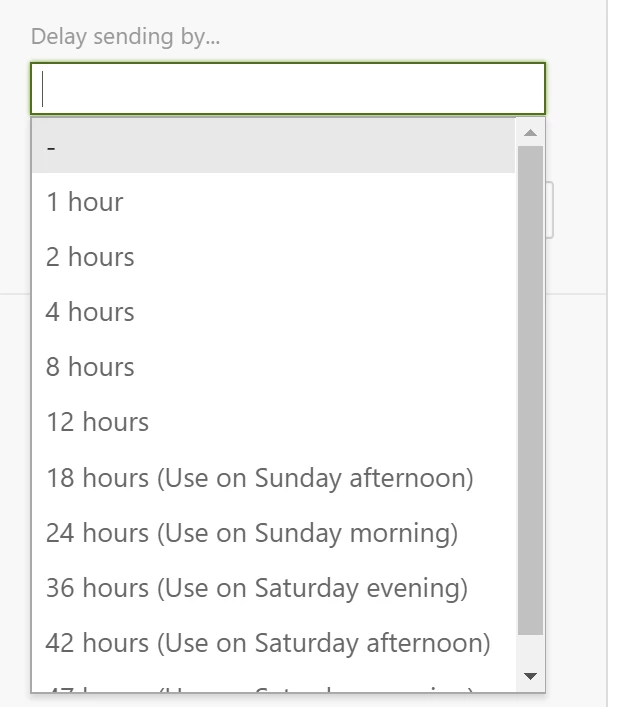
Step 5: Before submitting a new ticket or reply in Zendesk, simply select the delay from the drop-down

Zendesk will automatically add the tag when you submit.

If you skipped Step 4, then you'll need to manually enter the tag, such as "delay24". This also requires you to remember which tags actually exist, and which don't (entering "delay23" might not work!)... hence my suggestion of the drop-down.
Some other notes and caveats:

1. Test thoroughly!

2. Since automations only run once each hour, the actual delay will be the delay you set, plus up to 59 minutes (give or take).  So if you write a reply at 8pm on Sunday evening, and set a 12 hour delay, the message will go out some time between 8am to 9am on Monday morning. You'll see pretty quickly when your automation script runs. My account happens to be around 3 minutes after the hour -- so the emails are always sent in the first ten minutes or so of the hour. 

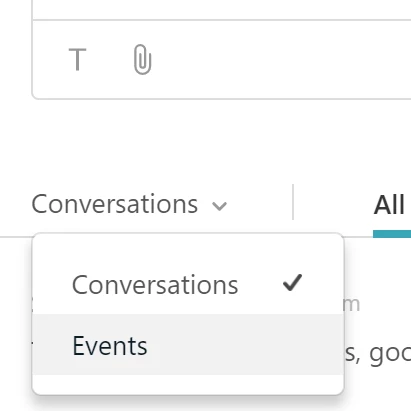
3. For troubleshooting, it's helpful to change from "Conversations" to "Events" view... then you can see the audit trail of when the automation ran and how things worked. 
That's it!  Hope it helps you...and if you have any other suggestions on how to improve this setup, please let us know!

 

29 replies

Employee
January 30, 2018

Slick setup, thanks for the tip Andrew!

Jennifer Rowe
Product Manager
January 31, 2018

Such a great tip, Andrew! Amazing. Thanks for sharing it!

I'll add this to our automations tips list. (And I made your headings larger to make them stand out more!)

Thanks again!

July 2, 2019

Thanks @Andrew Wilder, so I have been looking at this implementation and it meets my needs, however, after running through your setup several times, I am 99% confident I have this set up correctly.

When using the drop down method, (point 4), when selecting 1 Hour which should result in tag 'delay1' being inserted as a tag. It appears there is NO tag is inserted.

This surely comes down to the mechanics of the drop down box? Has anyone else experienced this issue?

Some screenshots showing the problem.

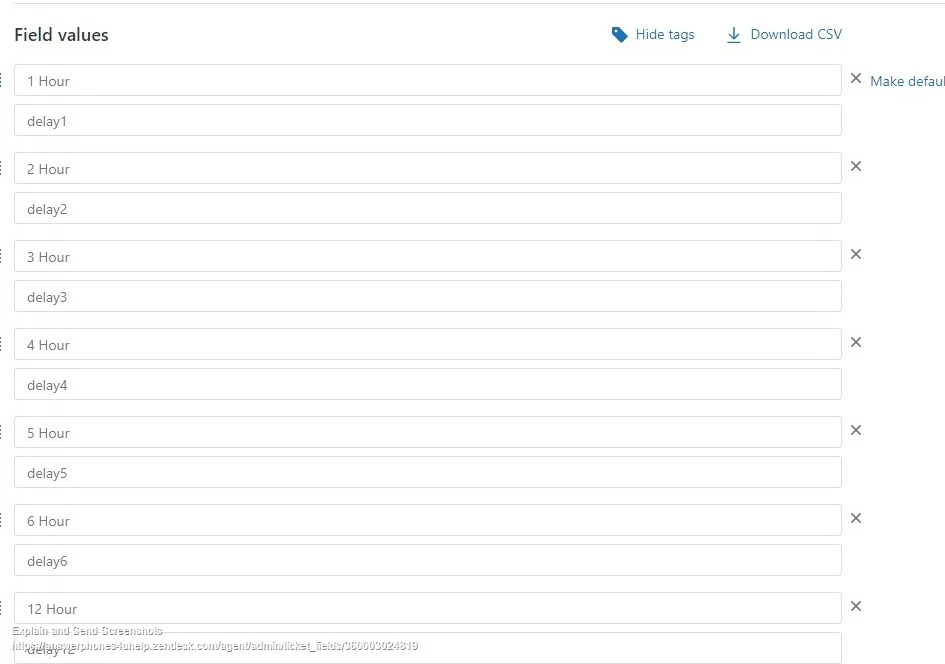
Dropdown box settings showing corresponding tags setup:

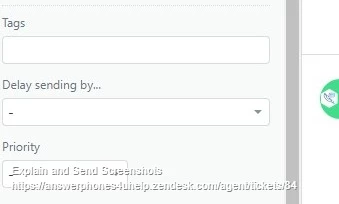
Before setting the 1 hour delay, empty tag and delay fields:

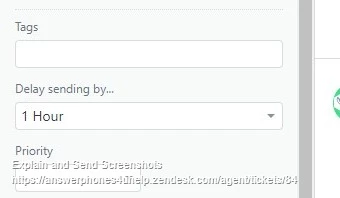
After selecting 1 Hour delay dropdown still NO 'delay1' tag:

So to confirm if I manually enter delay1 into the tag field, everything works as expected. 1 Hour delay before the ticket is sent.

So the problem is the tag is not being inserted from the drop-down field... Does anyone have any thoughts on this?

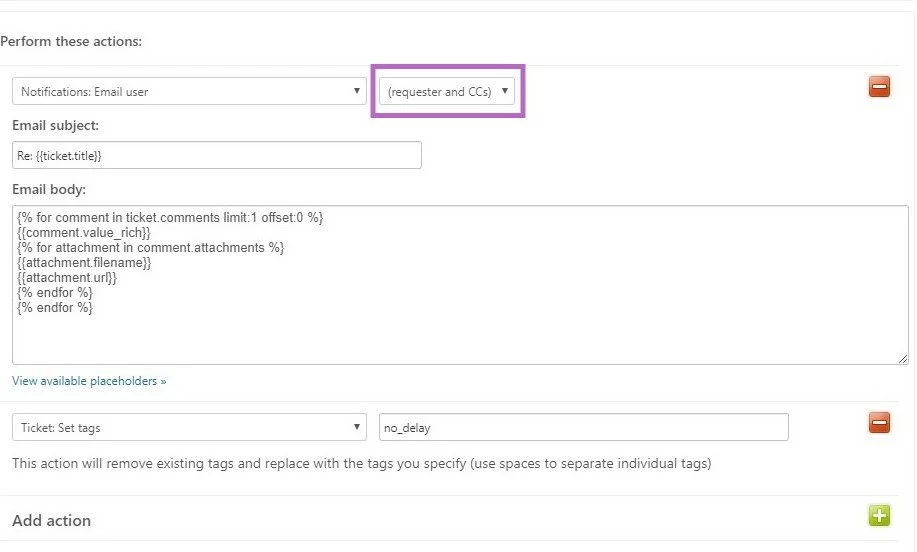
On another note I have seen there is an option with regard to CC users... Where you set 'notification email user' in the automation 'action', the image provided by @Andrew Wilder shows 'requester', if you click this box during setup I see 'requester and CC'. I have trialled that but the CC user still gets the ticket mail immediately.

Is this another fault?

However, maybe something is not yet caught up in my Zendesk for both these options to be not working. I can only hope it's something so simple...


Brett Bowser
Community Manager
July 2, 2019

Hey Michael,

Just to confirm, are you submitting the ticket after you've applied the 1 Hour delayed field? The tag would only be applied to the ticket after you've hit the submit button.

Additionally, you may want to check the events of the ticket to make sure these tags are not being removed when the ticket is updated. I'd also recommend you check your triggers/macros to make sure they're not using the Set Tag action since that will then remove any previous tags from your ticket.

Keep me posted!


July 4, 2019

Hi Brett,

I found what my issue was. Stupidly I was doing to much with one ticket before the time limit. 

I was forgetting I need to leave the ticket alone. So I was testing other time limits from the same ticket, forgetting it was removing the 'delay1' tag...

So all is resolved!


UPDATE TO MAKE CCs DELAY ALSO...

OK for CC users I can confirm as now tested. This works, you need to make a setting change to your Zen.

See article: https://support.zendesk.com/hc/en-us/articles/203661606-Configuring-CC-and-follower-permissions

Once you have set up CC and Followers and if you have opted for automatic set up you should not have to do anything, CCs should now go at the same time as the requester.

If your CC is still firing immediately check your Automation. As you can see in the purple box, (requester and CCs) is set and this will delay and then fire both together at the same delay time.

If this is set to (requester) then the CCs shall fire immediately and the requester will receive there at the permitted time.


Brett Bowser
Community Manager
July 5, 2019

That's awesome to hear Michael!

Thanks for taking the time to share the update with us as well :) 

November 25, 2019

I'm trying to set this up for use only on zendesk text tickets. Our main operations are on the east coast and wanting to reply but delay the sending of text responses for our west coast customers. Not being able to find a good way to do this. Any suggestions?

Brett Bowser
Community Manager
December 2, 2019

Hey Amanda,

Do you have any conditions in the ticket itself that could determine if the user is east coast or west coast? You could set up a text trigger that would immediately send the text to an east coast user. For any west coast users, you could set up an automation to send the notification after a certain amount of time has passed. We would need to figure out how to determine which user is east coast and which is west first.

Let me know if you have any additional information to provide.

Thanks!

December 2, 2019

Hi Brett! We could easily add tags to distinguish from east to west coast but the issue I'm running into is there is no automation for a text notification.

Brett Bowser
Community Manager
December 2, 2019

Hey Amanda,

Thanks for the additional information. You are correct and there's no text notification available in automations. That being said, you could use the automation to set a ticket field or apply another tag. Then a trigger that will send the text notification once the automation has updated that ticket with the ticket field or tag applied.

Let me know if that doesn't make sense :)